How to create a digital pants
https://www.youtube.com/watch?v=ceL58_AWYYs
Specifications and Measurements
Let's start by taking photos of your product. Make sure to capture both full and close-up shots of the front and back. If there are special details like pockets, collars, and zippers, take additional photos of these.
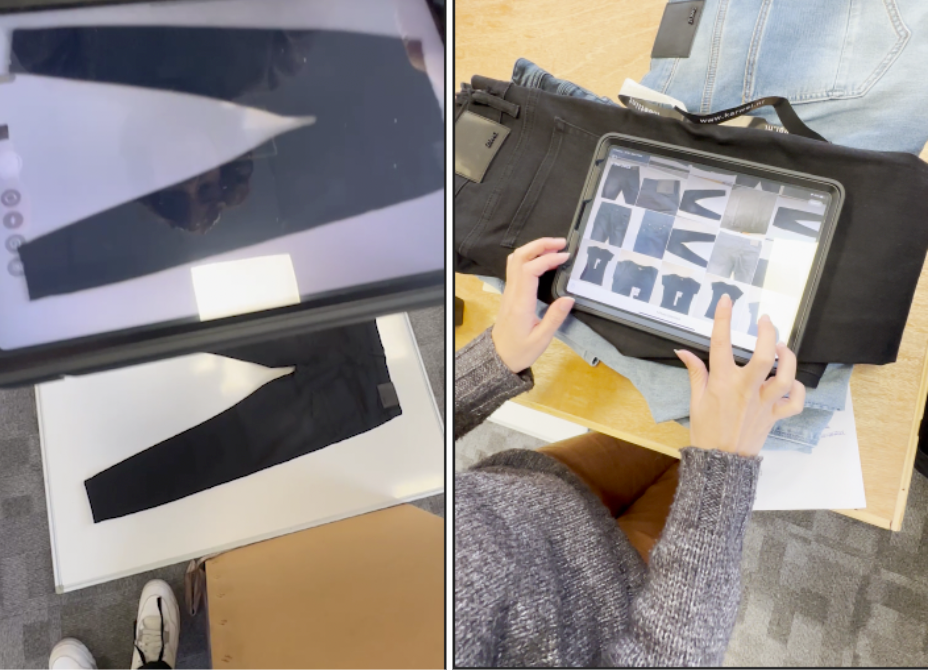
Email the photos to yourself for easy access and organization.
Save the photos in a folder with a recognizable name. Rename images with specific names, replacing spaces with underscores.
Common names include 'measurements', 'close-up', and 'details', with additions like 'front' or 'back'. For pockets and labels, add 'pocket' or 'label' followed by 'details', such as 'Front_pocket_details'.
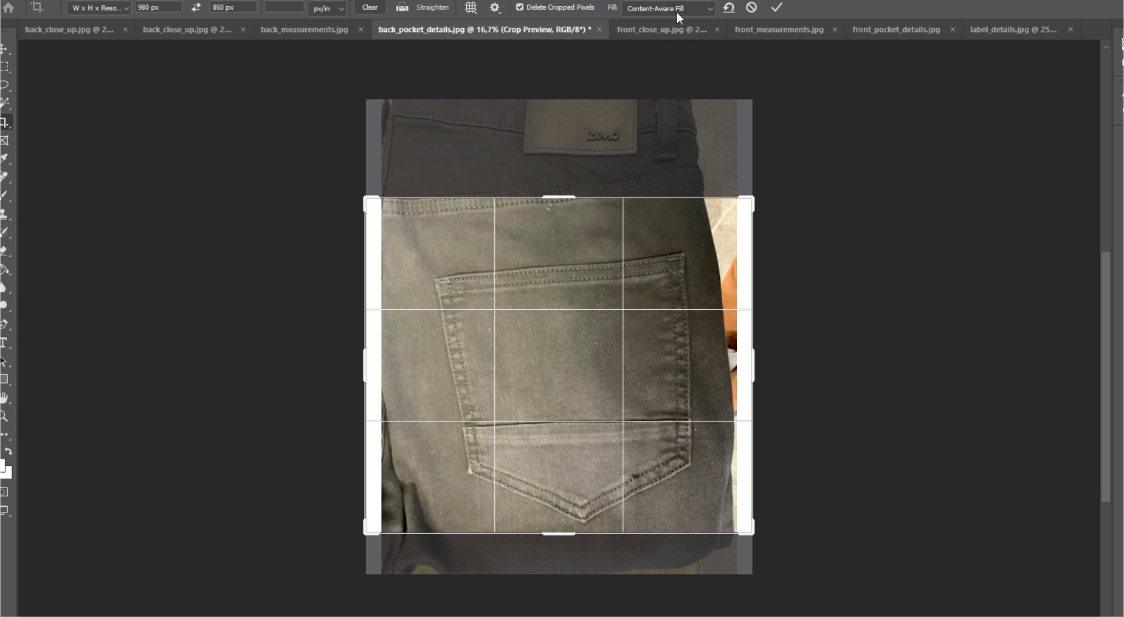
Open the photos in Photoshop and use the Crop Tool to resize them to 980 by 850 dimensions.
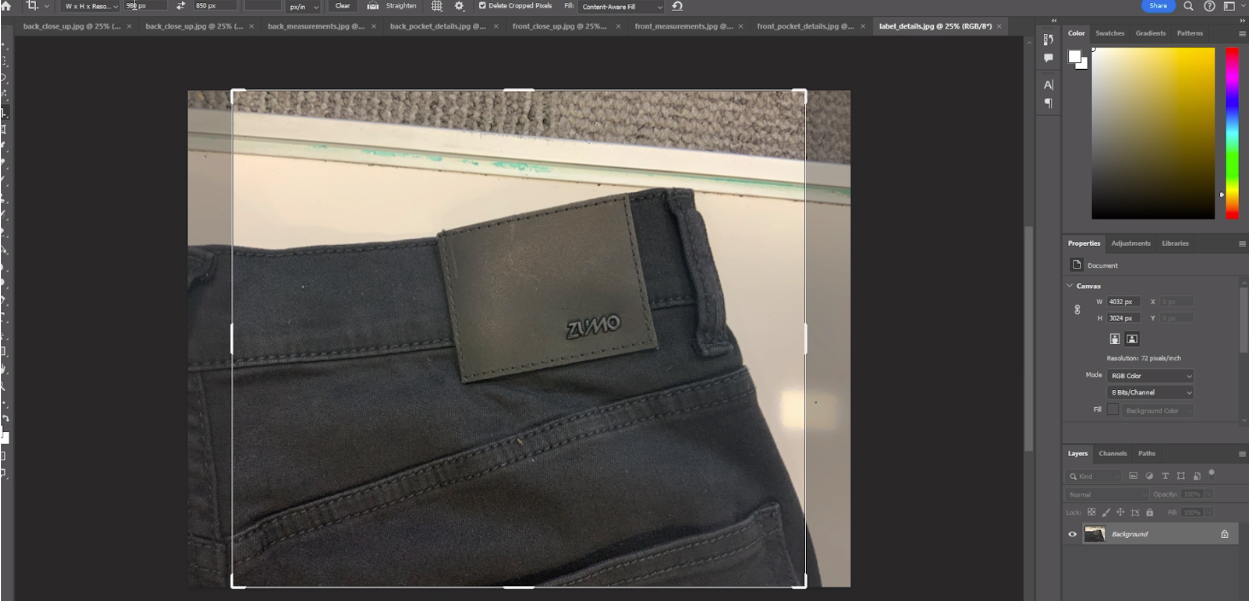
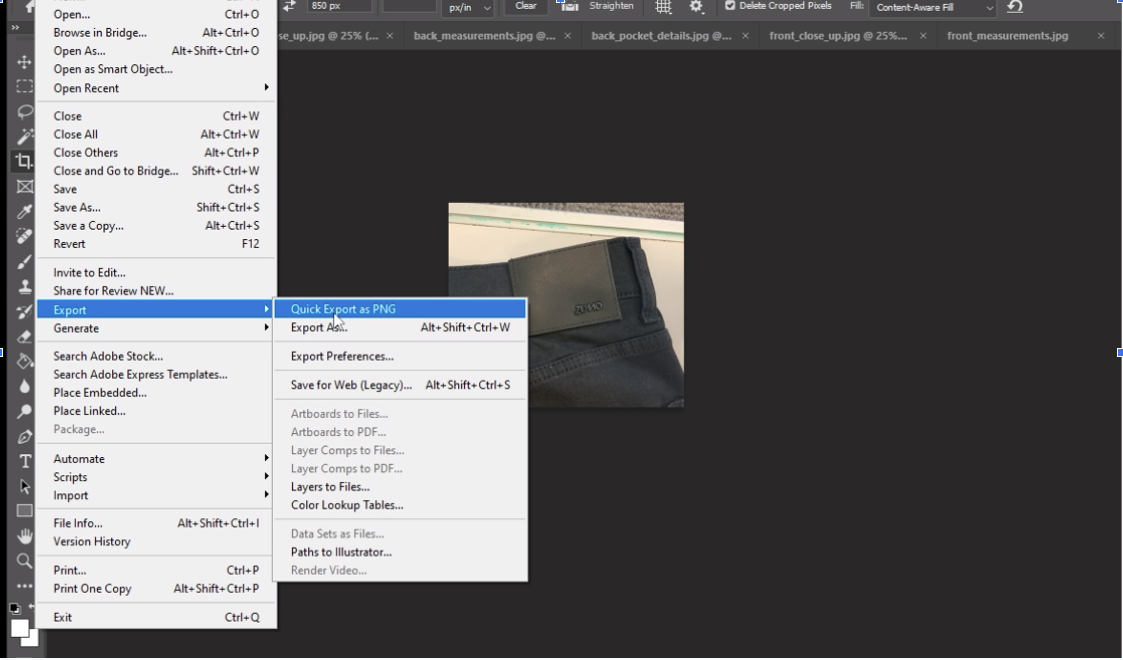
Ensure everything you plan to measure is still visible. Save all images as PNG files.
If you need to add rather than crop because not everything fits, select 'Generative Expand' at the top under 'Fill' in Photoshop, which will expand the image.
Press the + button to add a product. Name it with the product name and size. Save the new product and refresh the page. Press ‘edit' and go to 'Specifications', where you can upload the PNG images.
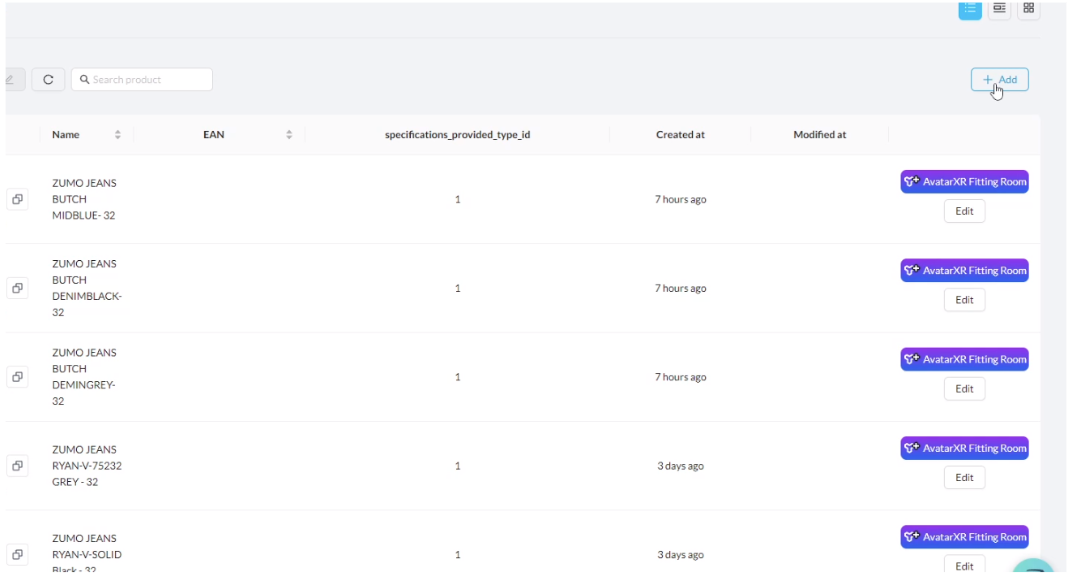
In the OutfitXR locate your product and "Click 'Edit'.
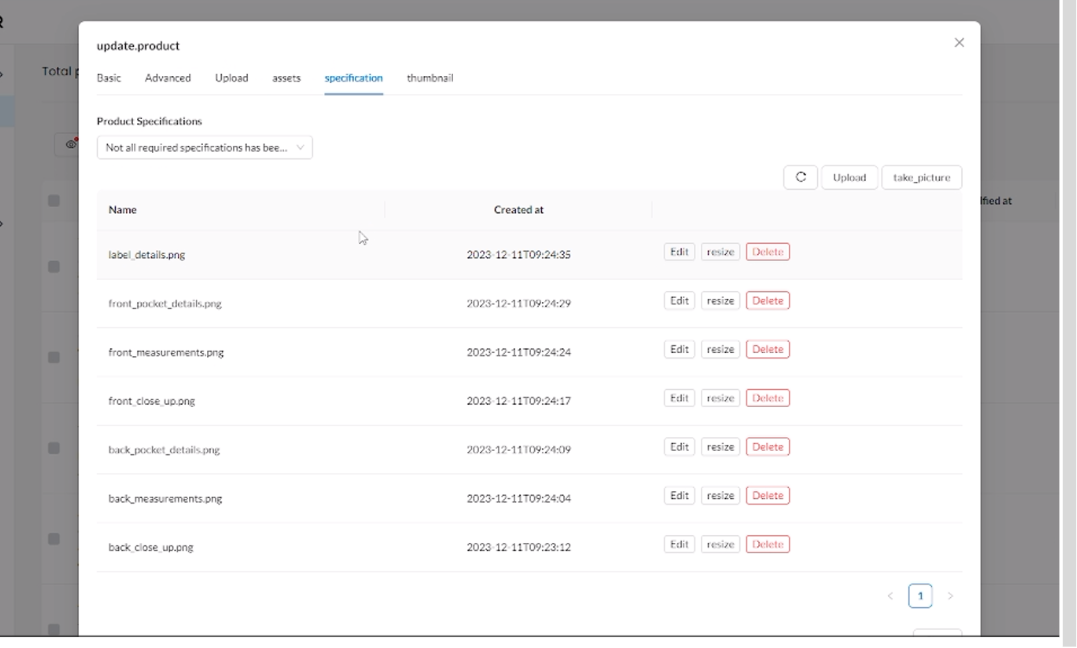
Go to the specification and press Edit on the image to create specifications. The image will appear.
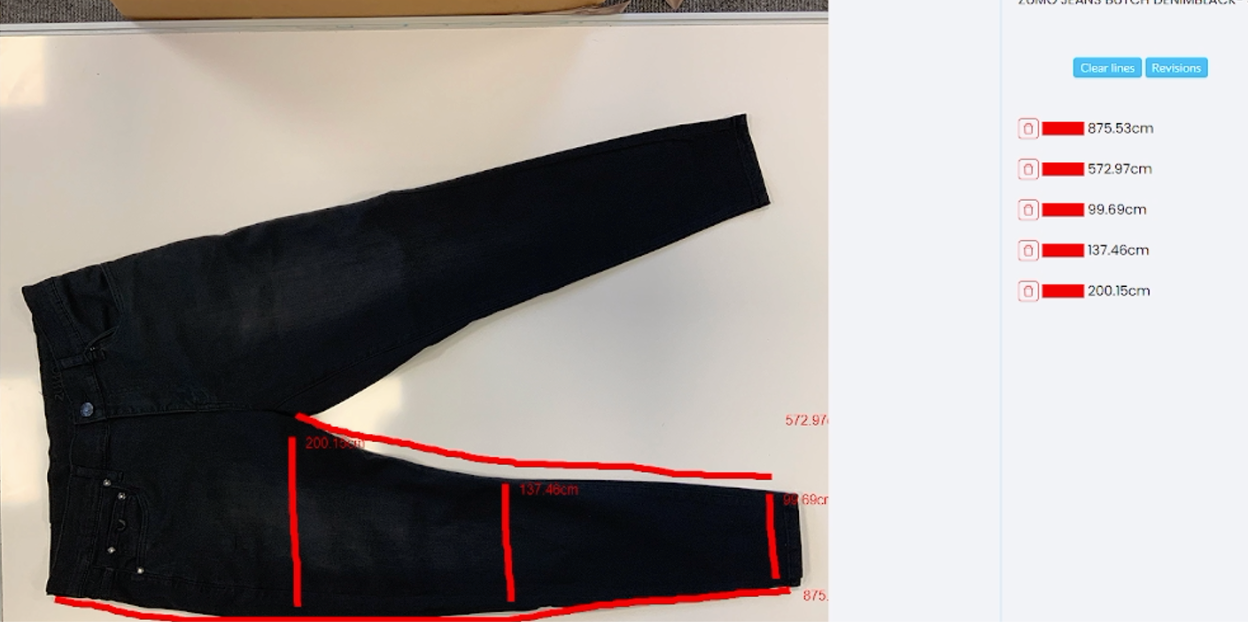
Start by taking measurements of your pants, and in outfitXR draw lines by right-clicking along the seams of the garment. Repeat this process for all required measurements.
To delete a line, go to the schema next to the photo or right-click on a line to remove or adjust its length.
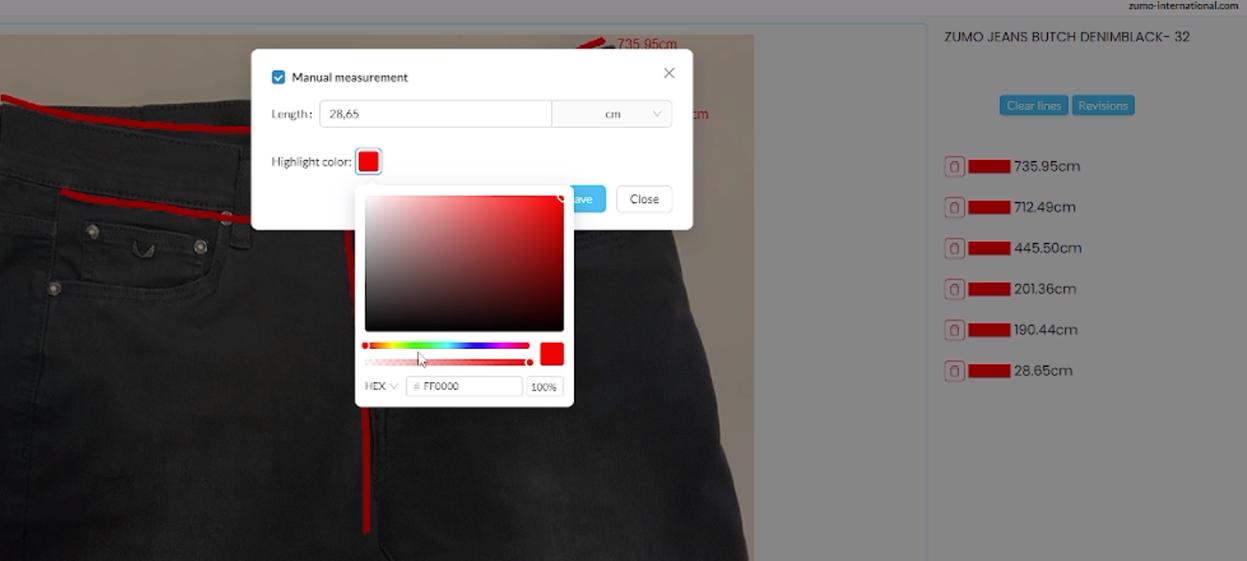
If adjusting the length, make sure 'Manual measurements' is enabled and enter the length in centimeters.
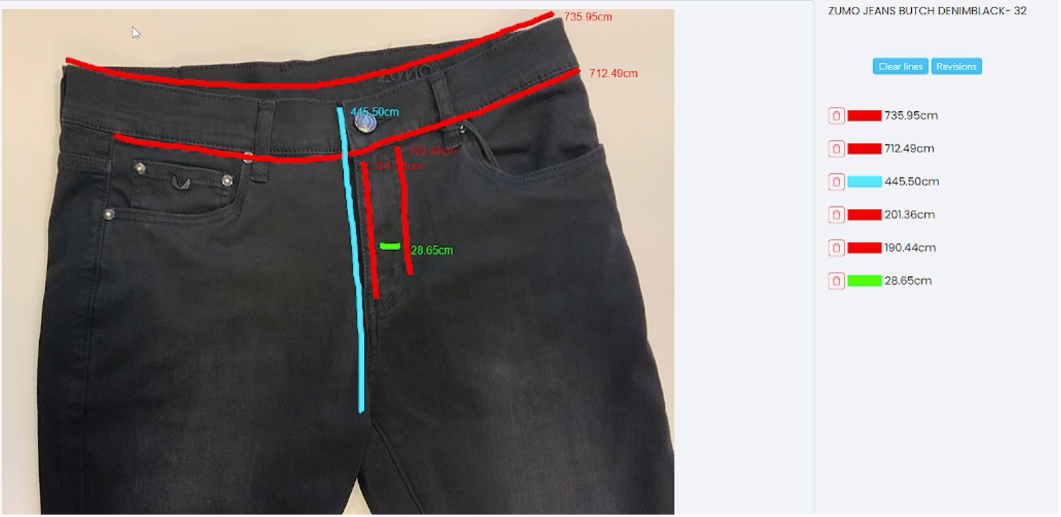
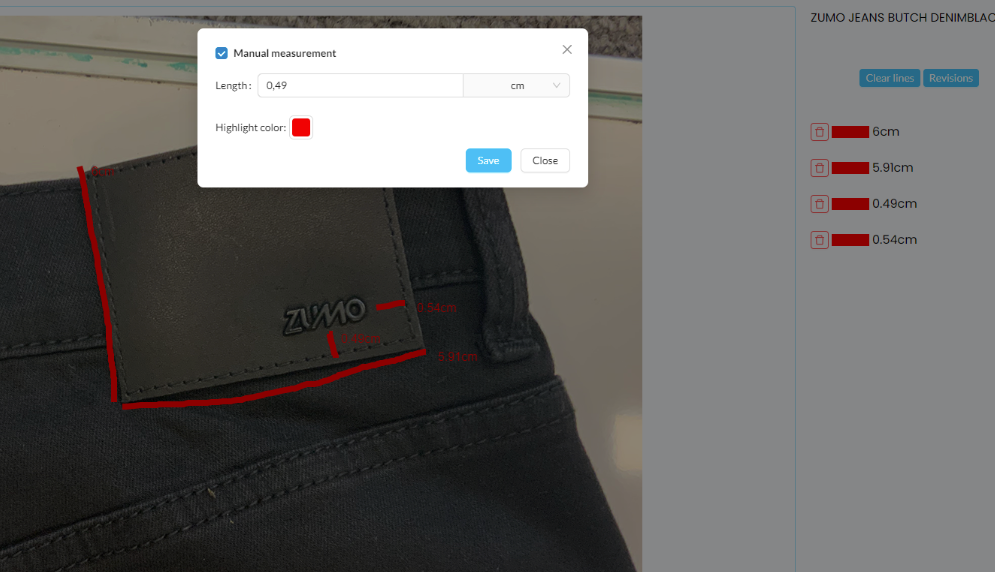
If it's unclear which line corresponds to which measurement, edit the line to change its color. Adjust the highlight color, ensuring manual editing is enabled before saving.
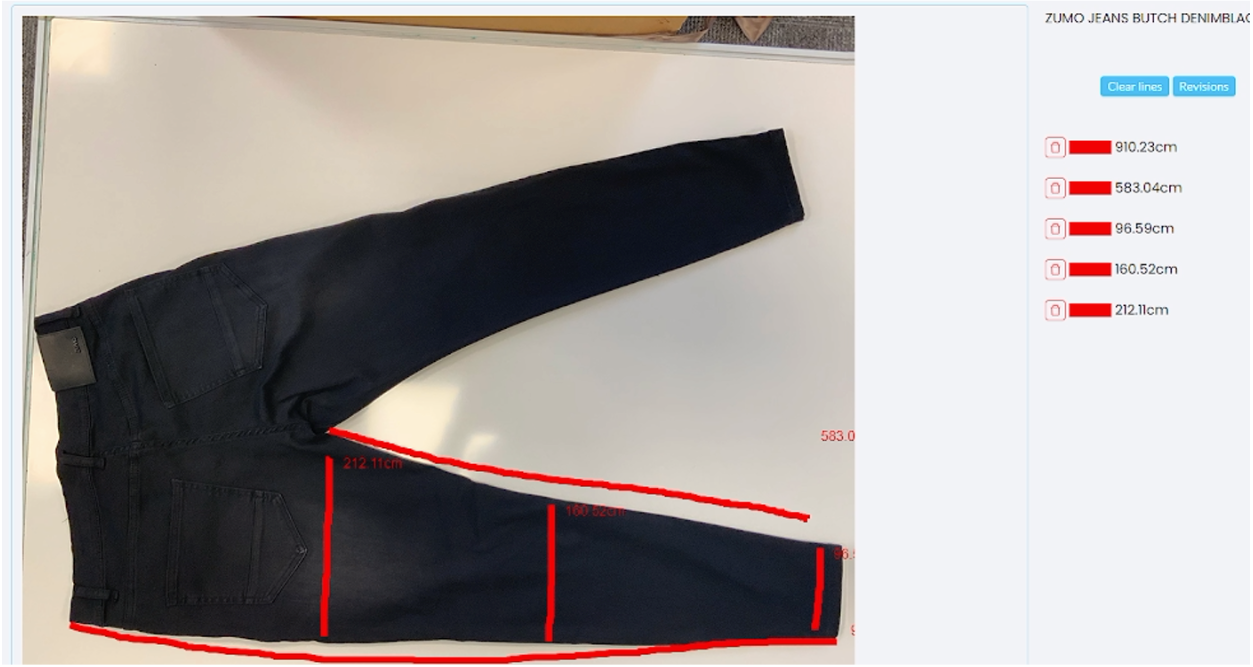
For the full image, measure both height and width starting from the seam lines.
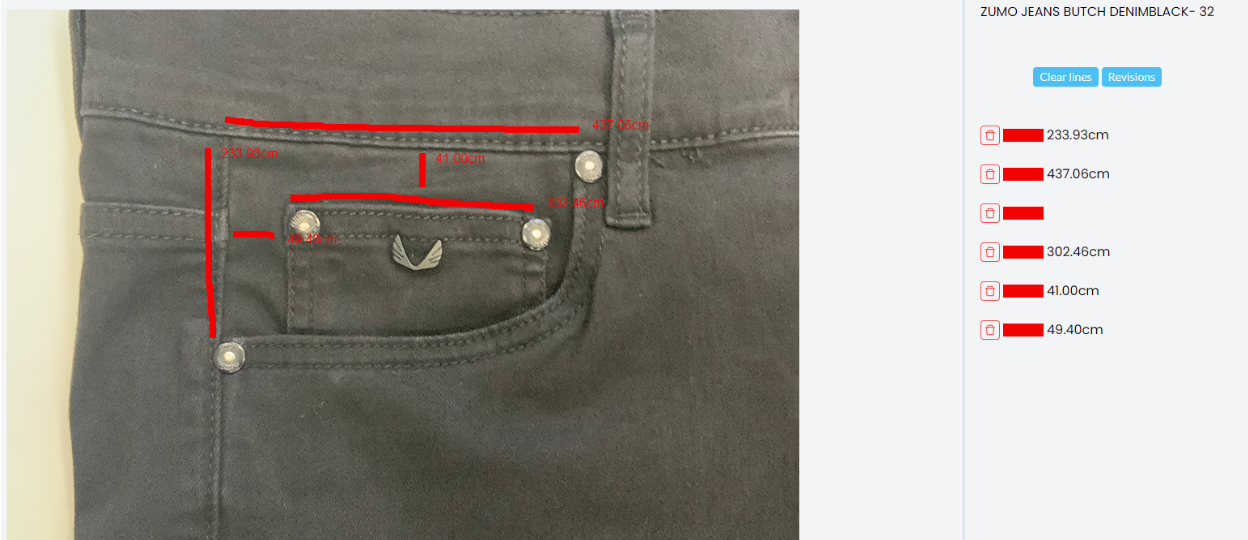
For the front pocket, measure the width and height.
For the back close-up, measure all seam lines and the distances between them, following the instructions in the video.
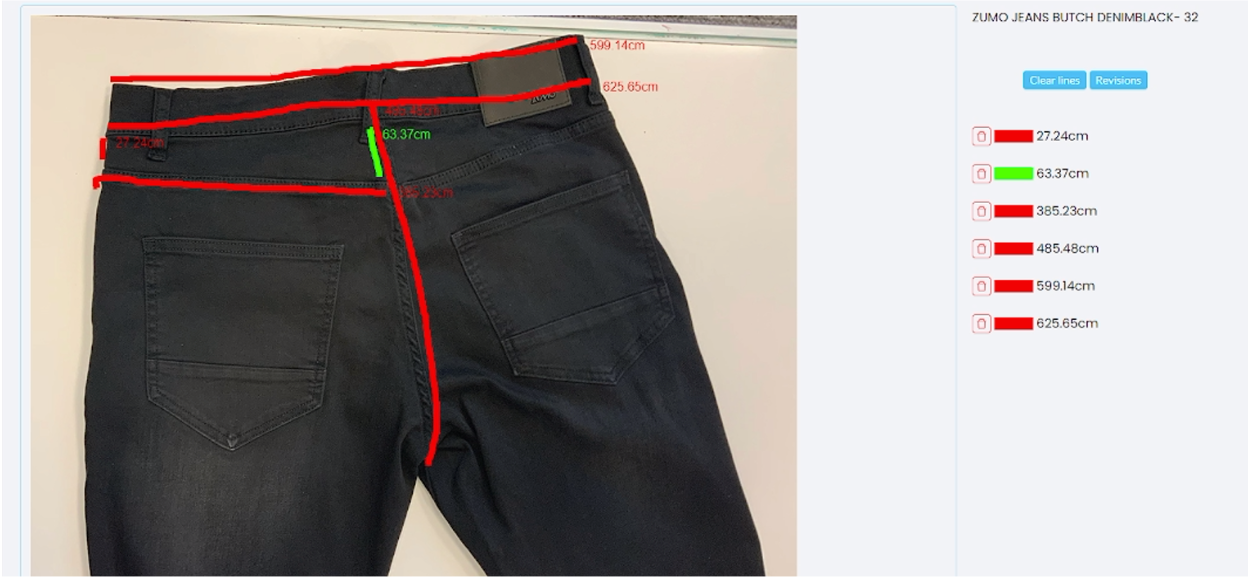
For the close-up, measure the top edge of the pants and from the seam line.
For the back pocket, measure both height and width, including from the extra seam line.
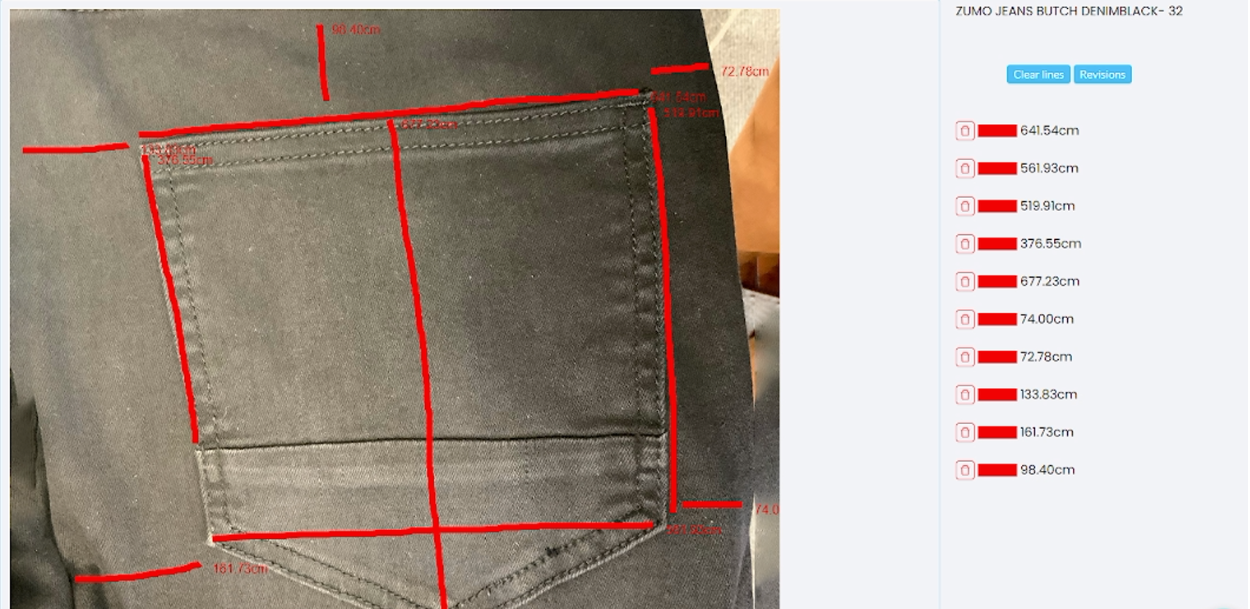
Measure the back in the same manner as the front, considering both height and width. Keep in mind that dimensions may be larger than those of the front.
Creating Pants Garment in Marvelous Designer
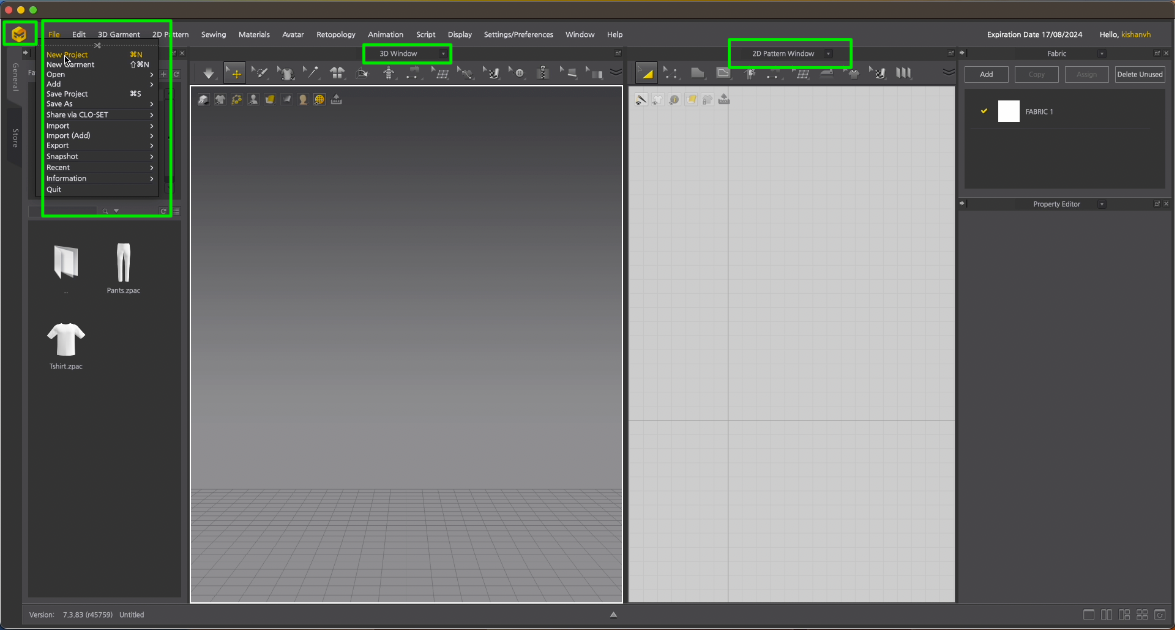
Open Marvelous Designer and create a new project. Go to File then New, and save your project in a desired folder.
Make sure that you have an overview of both 3D window and 2D Pattern Window.
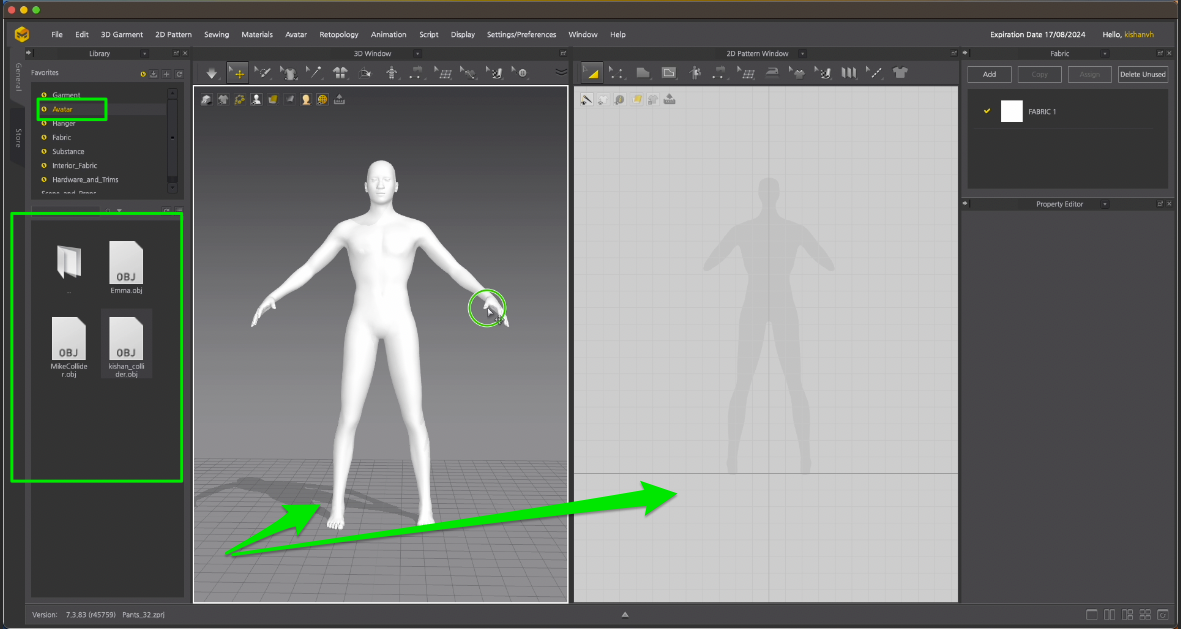
Choose a default avatar from the left panel of the window, or upload your personal one if you have it.
Now you can view your avatar in both the 3D window and the 2D Pattern window.
Use the mouse scroll wheel for navigation in both areas—press it to move and rotate. To zoom in, simply scroll the wheel, and for 3D space rotation, use the right mouse button.
Marvelous Designer comes with default garments that you can import into your project and customize as required.
In the left panel, go to the Garment section, and choose the simplest Pants Garment from the list. Double-click on it to proceed.
Retarget the draping of the pants onto the avatar by following the provided steps.
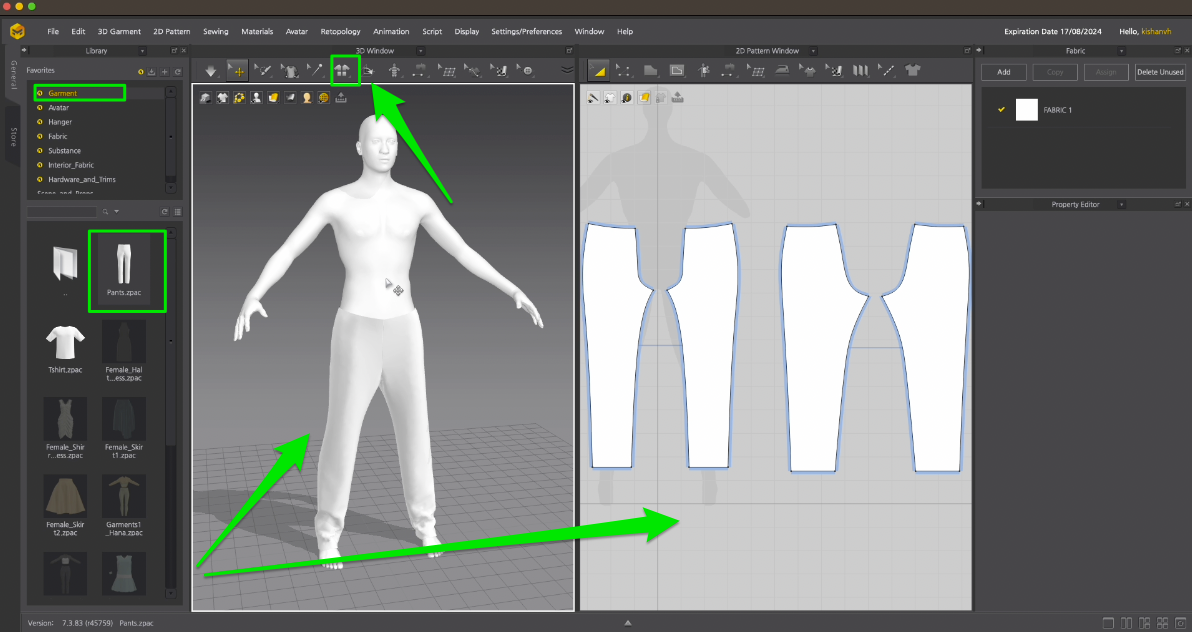
We need to delete all existing seams of the garment to demonstrate how the patterns are interconnected or sewn together.
Now, navigate to the 2D Pattern window and select all patterns. Return to the 3D window, right-click, and select 'Reset 3D Arrangements'.
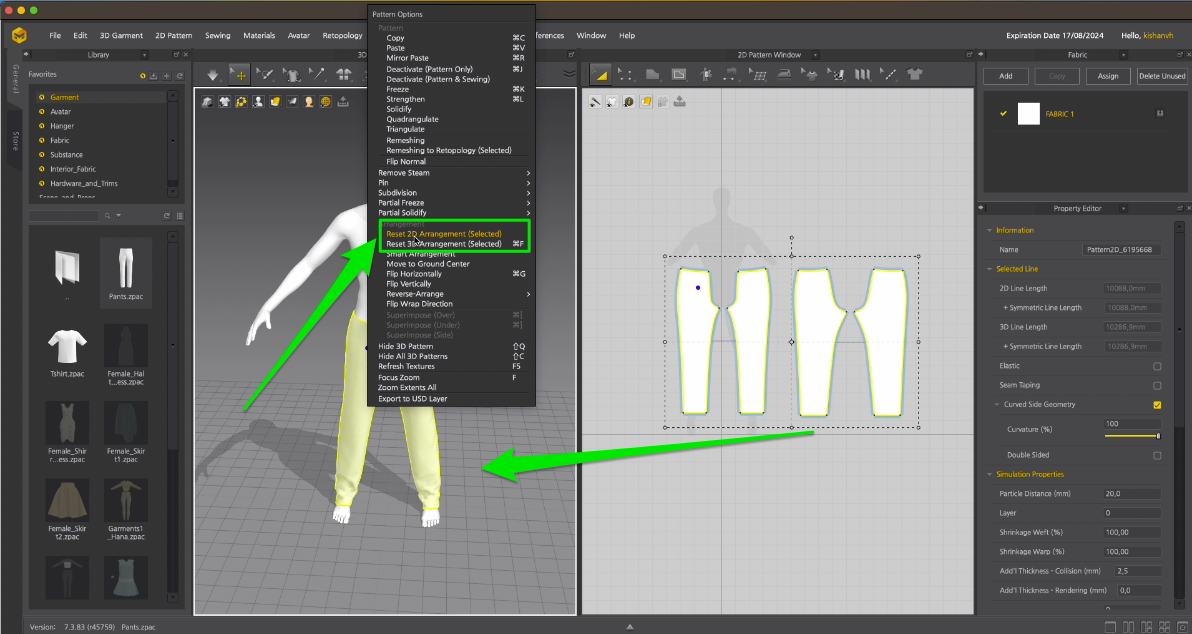
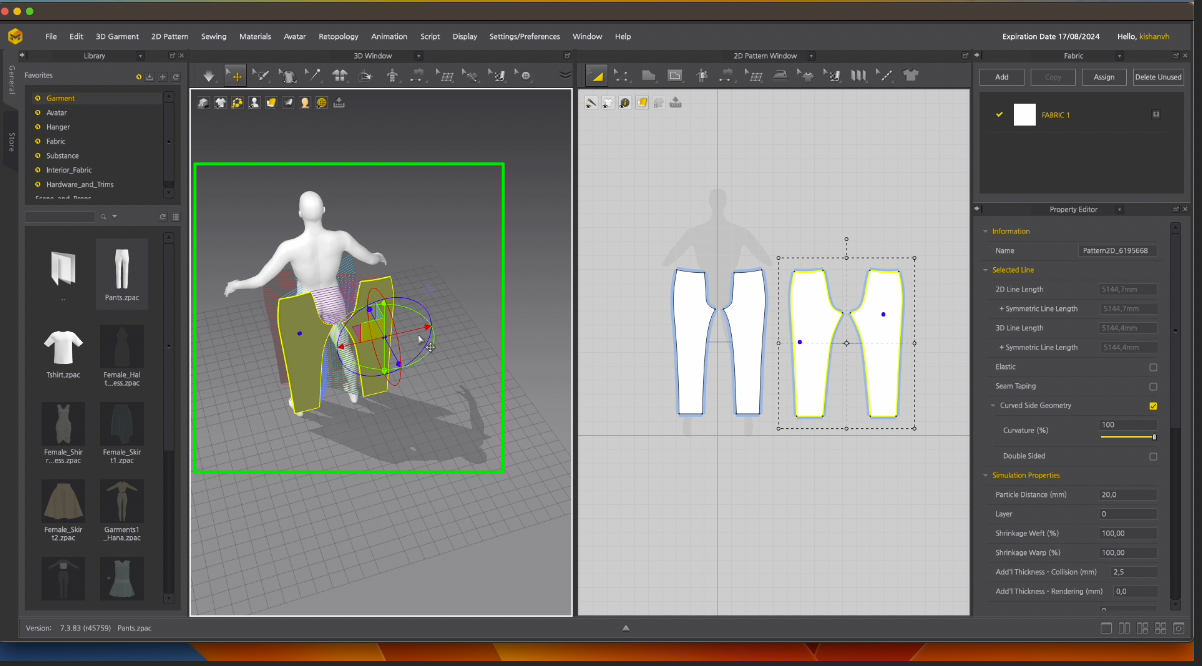
Arrange the patterns in the 3D window, ensuring the front patterns align with the front of the avatar, and the back patterns align with the back of the avatar.
Select the patterns and move them as necessary. Work in the 3D window to achieve a better overview.
In the 3D window, go to Sewing Tools and select 'Edit Sewing'.
Select the sewn segments and delete them by clicking the delete key.
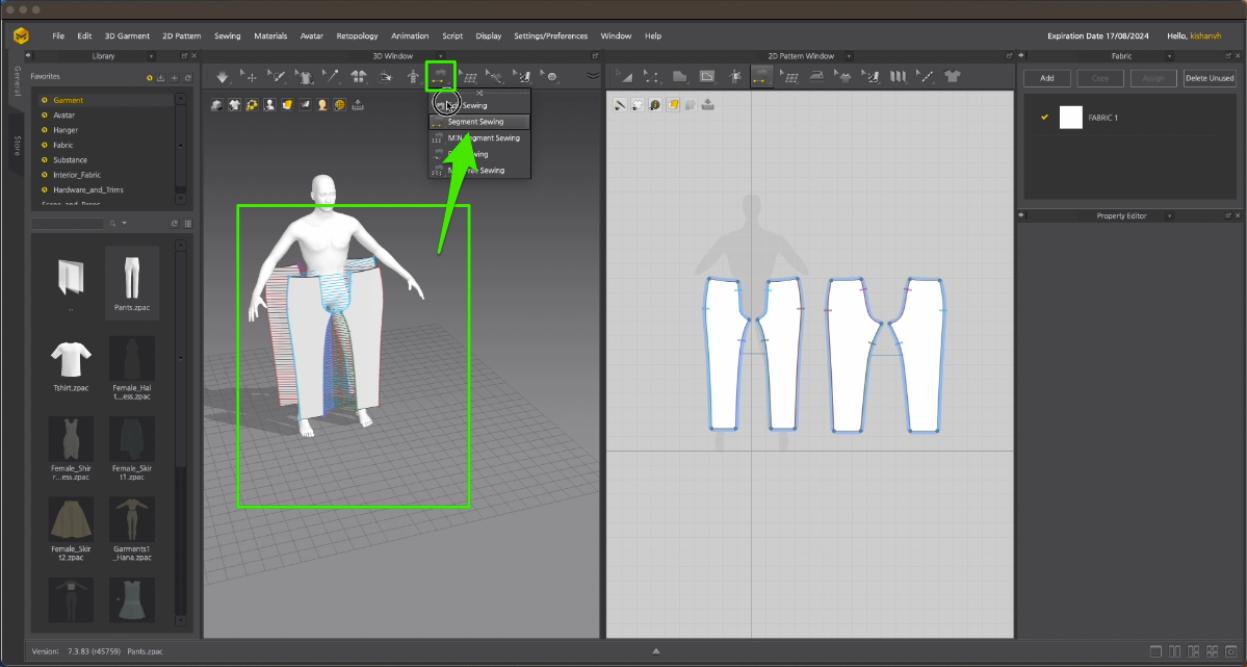
We'll go through it again for a better understanding of how it works.
Ensure that all patterns have the correct orientation. In our case, we need to adjust the facing of the back patterns. Select both back patterns, right-click, and choose ‘Flip Horizontally’.
In the 3D Window navigate to the Segment Sewing. Begin by selecting one segment, then choose a second segment to get an overview of the sewing connections.
Consider the logical connections between garment patterns; where the pants patterns would have seams.
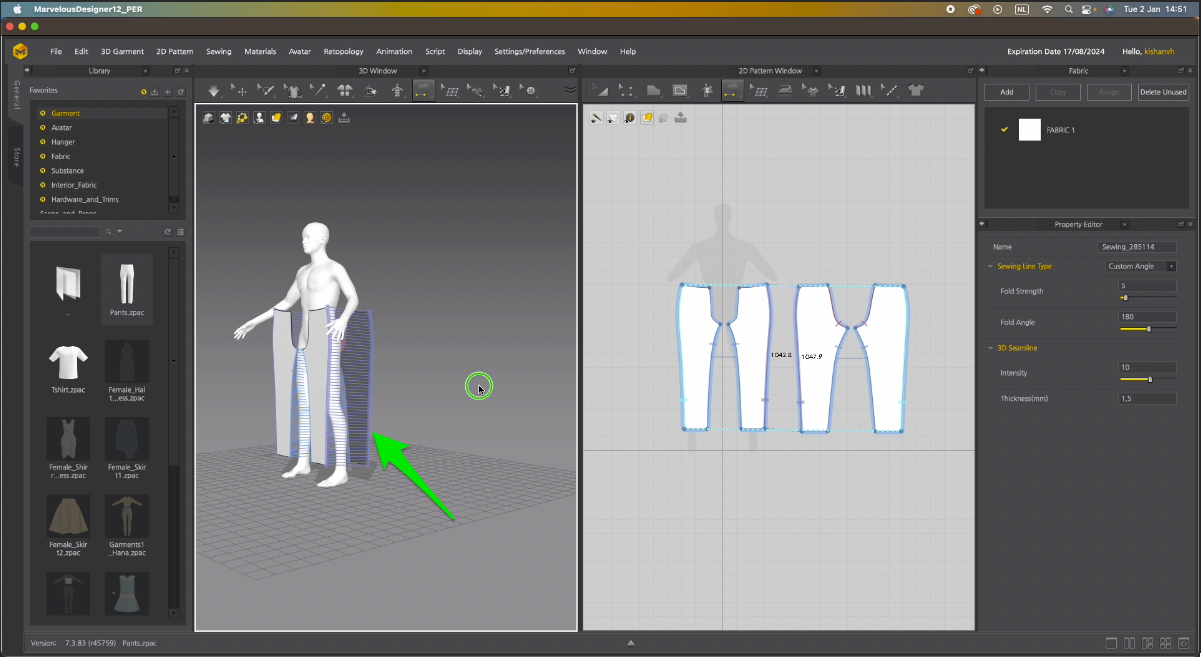
Adjust, move, or rotate the pattern as needed. Simulate or rearrange the patterns on the avatar. Press the spacebar or navigate to the Retarget Draping option.
Navigate to the 2D Pattern Window to adjust the pants according to your measurements and specifications.
In the 2D view, make sure they cover the torso area. Press Shift+Z for a quick overview of the size lines in your design.
We will start by drawing internal lines. Ensure that you have the specifications of the pants at your disposal.
Navigate to the top panel of the 2D Pattern window and select 'Internal Polygon Line'.
Begin drawing the internal lines where adjustments are needed for the pants pattern.
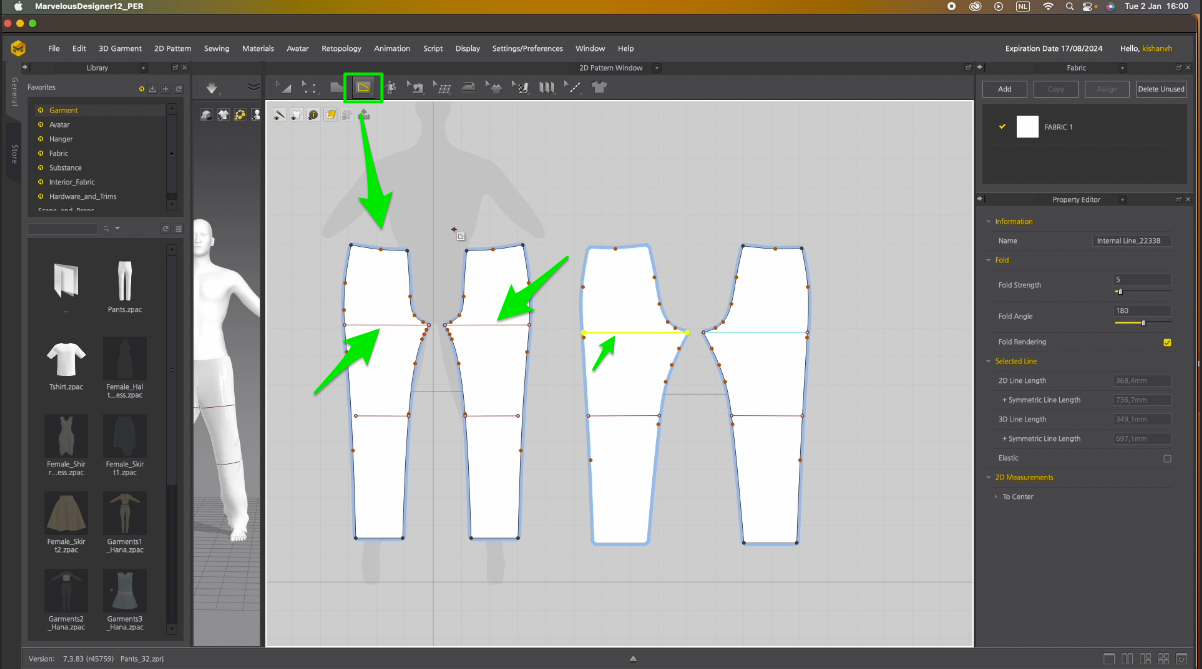
Adjust the pattern points and lines by clicking the Z key, or go to the Edit Pattern in 2D View. Carefully select each line and make the necessary adjustments.
Select the line, right-click, and choose 'Change Length.'
In the pop-up window, modify the length of the line. Remember to adjust the direction as needed; you can change from the start, both, or end.
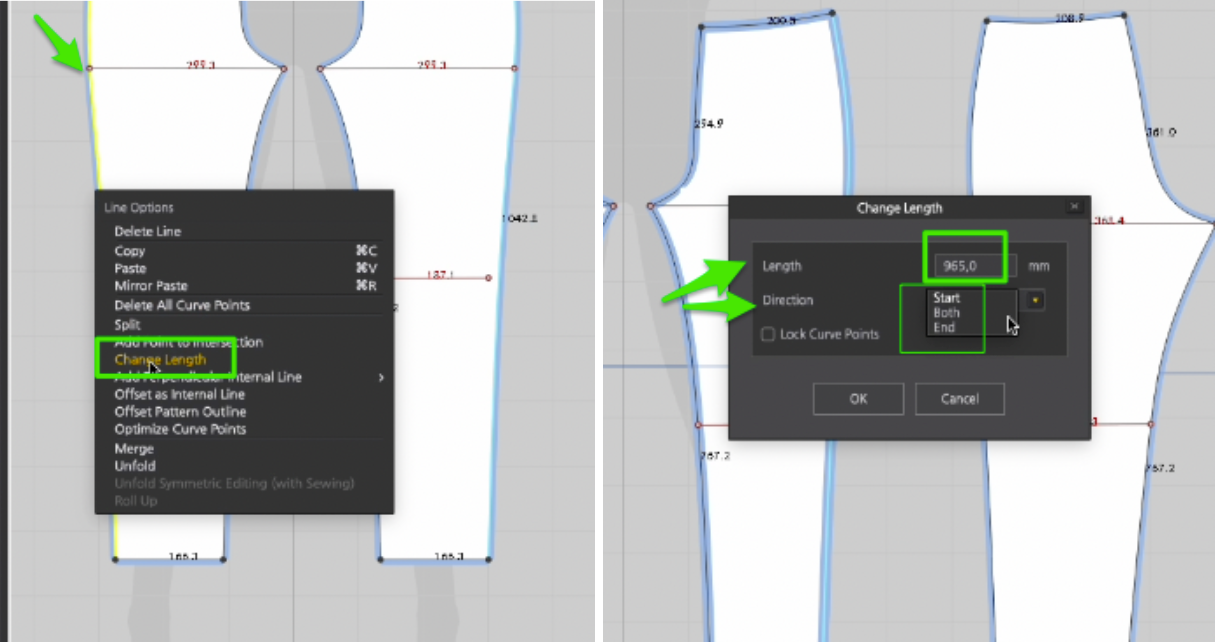
Repeat these steps for all the lines. So adjust line dimensions by clicking on the line and then using the right mouse button to access 'Change Length’. Remember to save your project periodically.
Select all patterns and simulate the garment on the avatar again in the 3D Window by pressing the spacebar key.
Adjust the internal lines. After adjusting the pattern lines, these may have shifted. Move them back to their positions and adjust their size. Review your specifications once more.
To adjust the curved lines, press the C key. Adjust the line by selecting and dragging it in the desired direction.
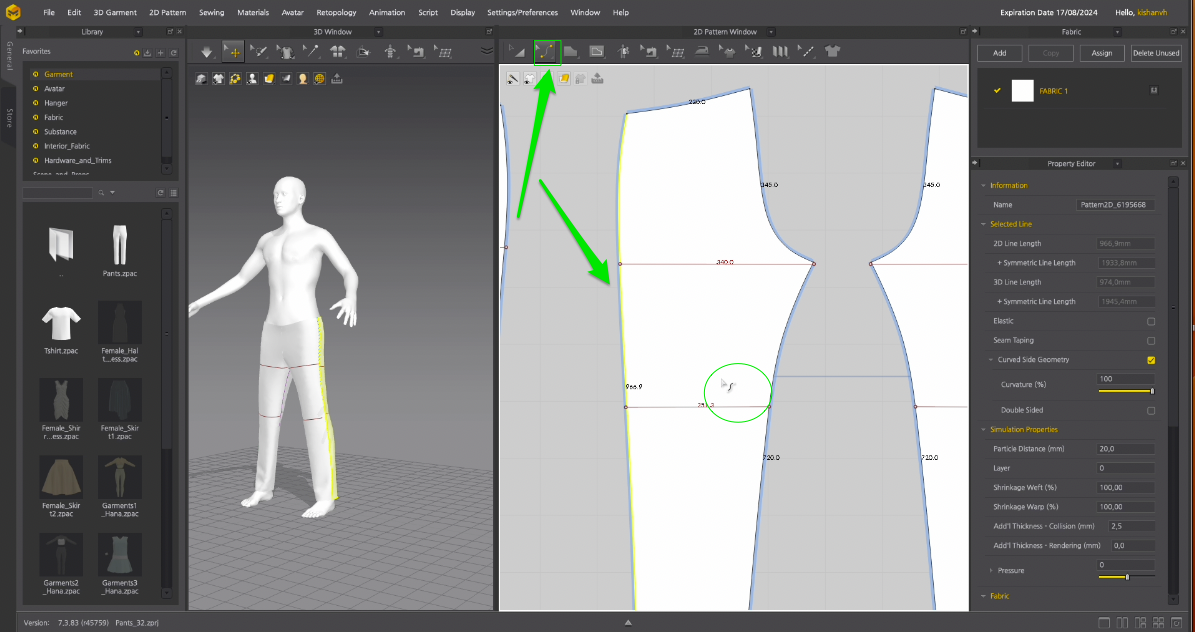
Regularly double-check the sizes of the lines you've adjusted. When you modify one, the nearby lines might shift a bit. Stay patient and keep verifying to ensure the sizes are just right.
Now, let's focus on adding details, specifically pockets and the fly of the pants.
Prior to that, let's incorporate the seam along the lower edge of the pants and the top waistband.
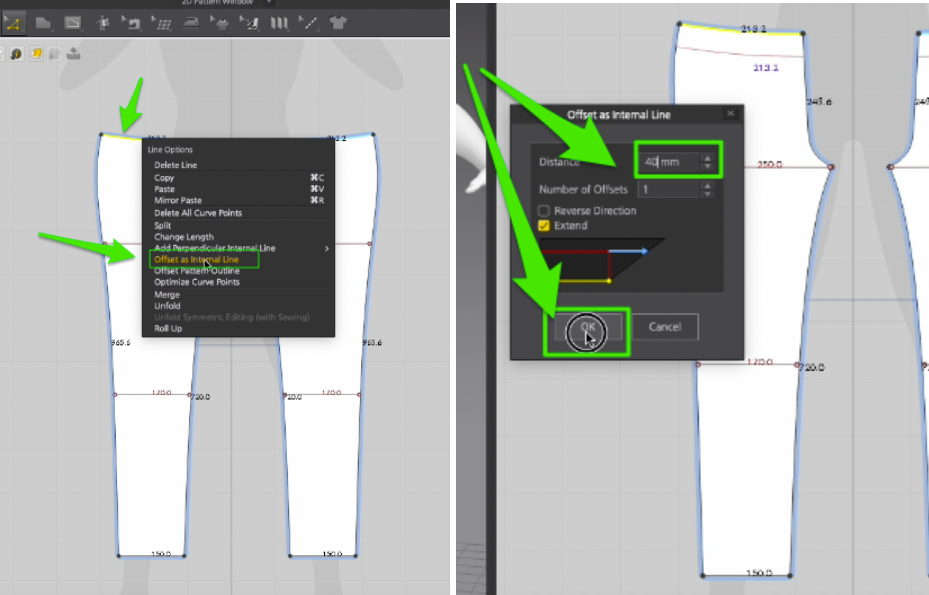
Select the line, then right-click and choose 'Offset as Internal Line.' In the pop-up window, enter the desired distance and click OK.
Select the internal line, right-click, and choose ‘Cut and Sew’.
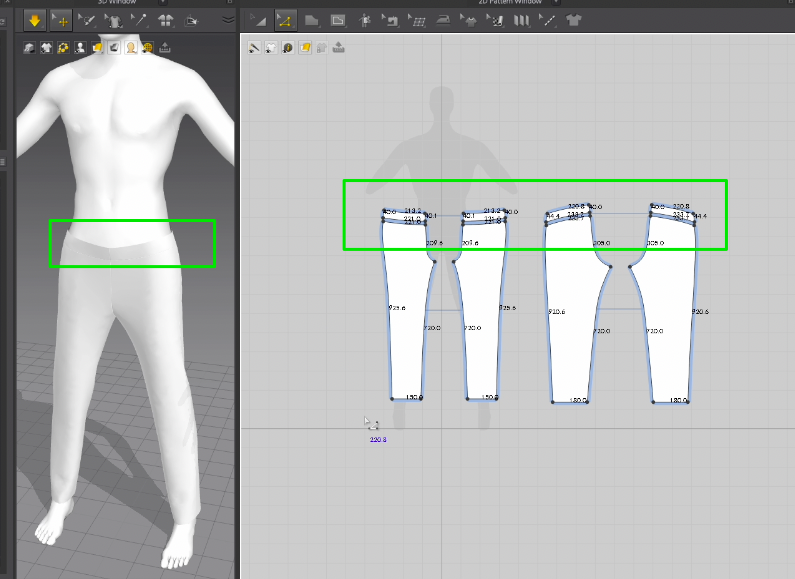
Delete the internal lines as they are no longer needed.
Repeat these steps for the bottom seam of the pants.
We'll start by shaping the front pockets.
Choose the Internal Polygon Line tool and begin drawing the shape for the front pocket.
Adjust the shape lines and resize them as needed.
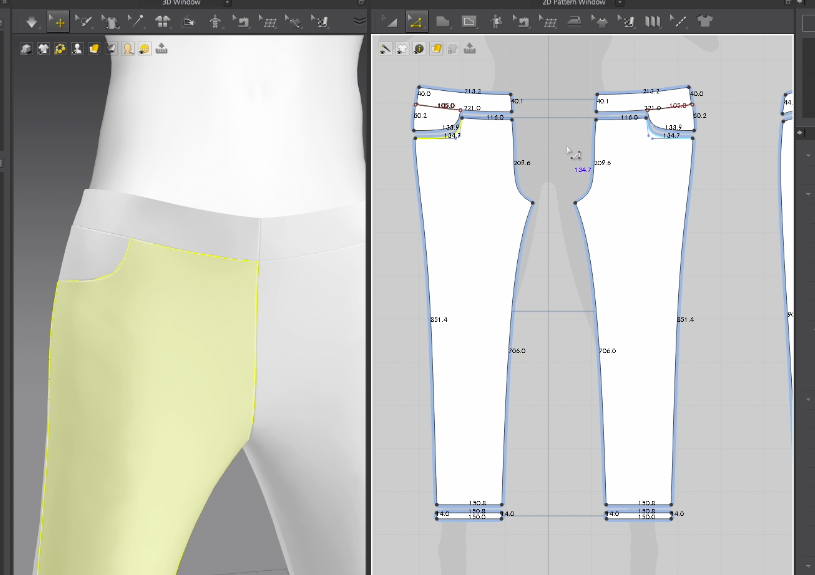
Select one of the front shapes of the pants, right-click, and choose ‘Remove Linked Editing’.
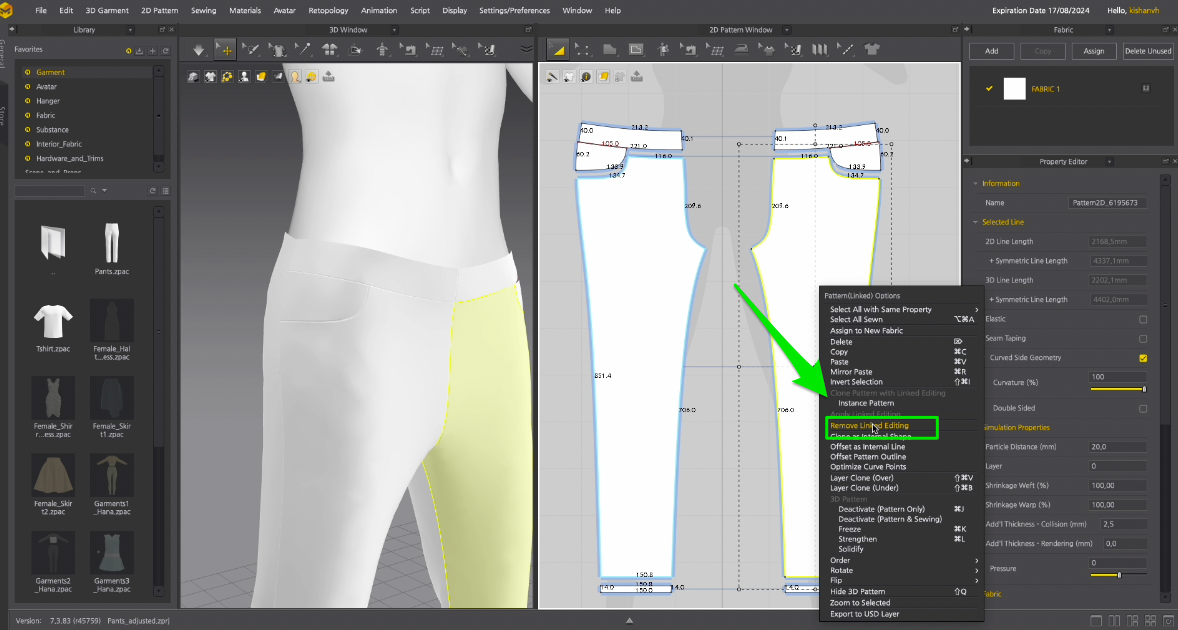
We do this because we need to draw the pants' fly, and this feature is present only on one shape. Therefore, the front parts no longer need to be linked.
Choose the Internal Polygon Line tool and begin drawing the shape.
To adjust the curved lines, press the C key. Adjust the line by selecting and dragging it in the desired direction.
Select the line, right-click, and choose ‘Change Length’. Select the internal line, right-click, and choose ‘Cut and Sew'. Delete the internal lines as they are no longer needed.
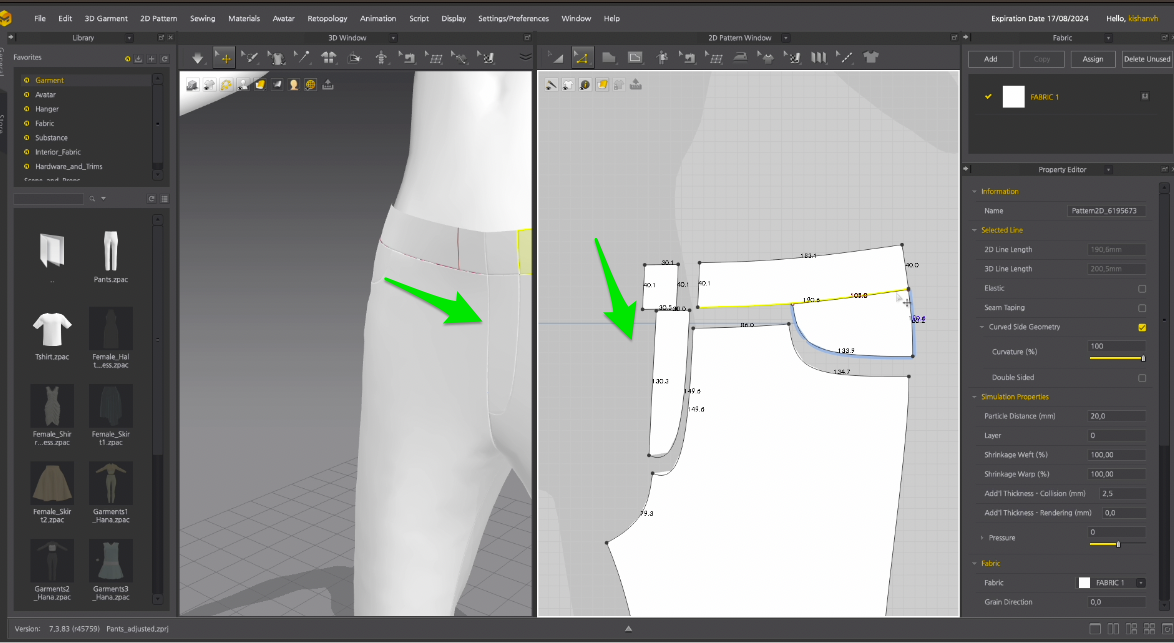
Once again, choose 'Remove Linked Editing' for these shapes.
Let's create the back pockets.
Select the Internal Polygon Line tool and start drawing the shape for the back pockets. Refer to your specifications to determine the size and positions of the pockets. Adjust, move, or rotate the pattern as needed.
Select the internal line, right-click, and choose ‘Cut and Sew’. Delete the internal lines as they are no longer needed.
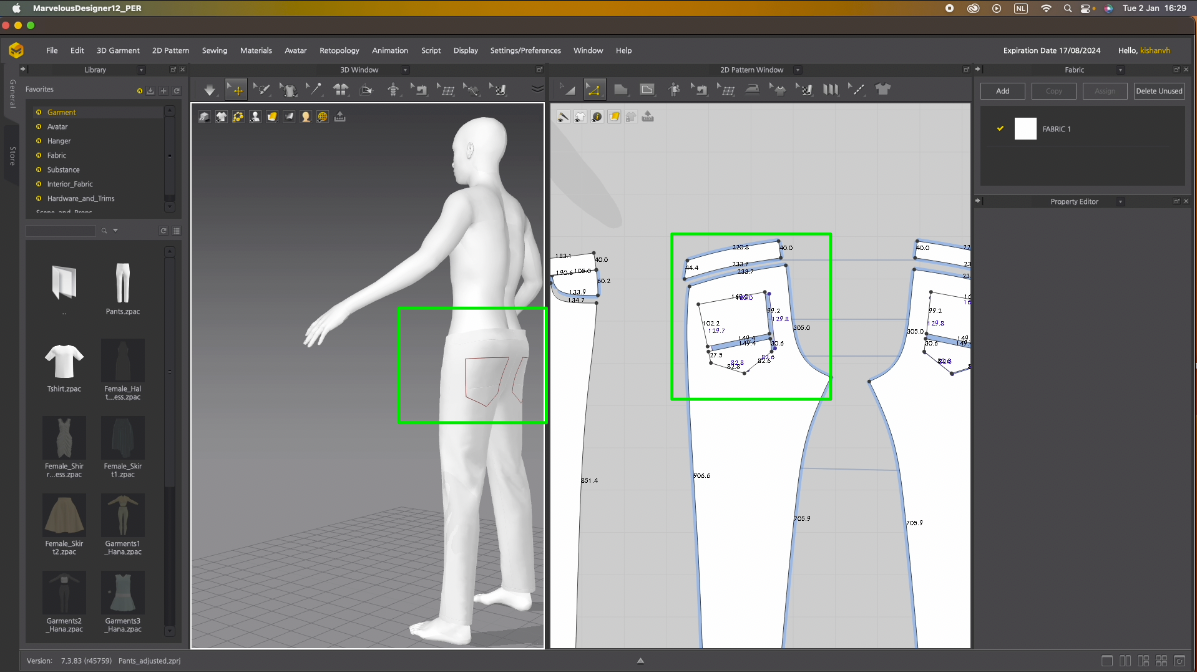
Now, we are ready to apply textures and materials to the pants.
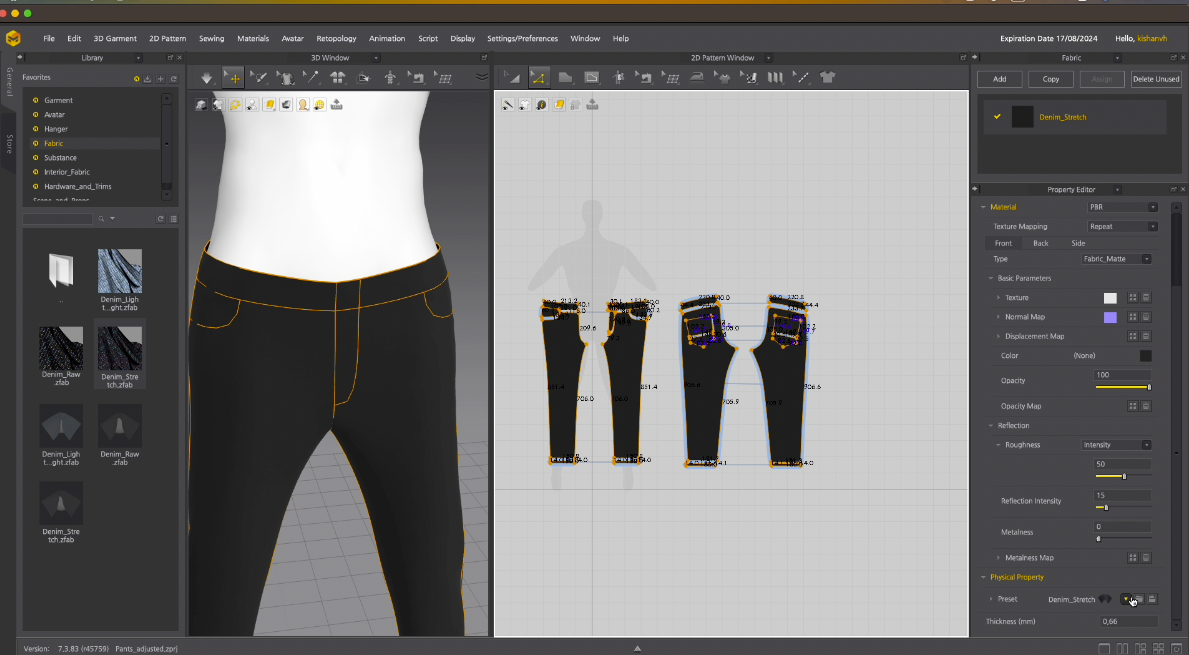
Navigate to the fabric in the left panel, choose the desired fabric, and make adjustments in the right panel. You can edit the texture in the Property Editor.
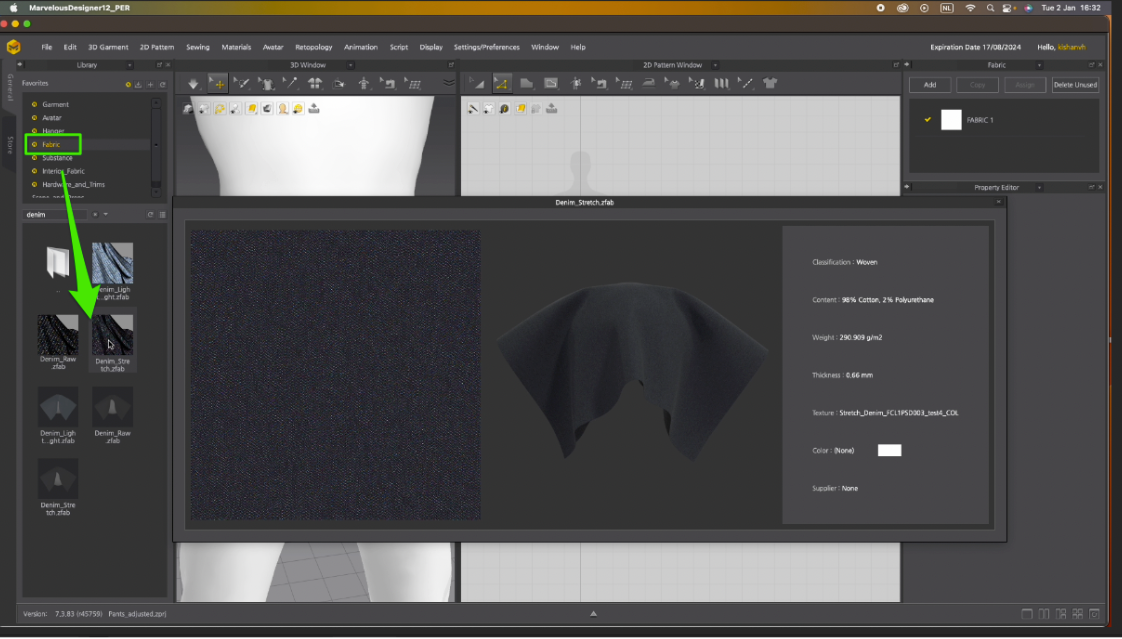
Apply the fabric texture to all shapes, and then delete unused fabrics.
In the Property Editor on the right panel, add or change the Normal Map and adjust the color of the fabric.
Check for desaturation and add the necessary color. We will leave other properties untouched for this texture, as they suit our needs.
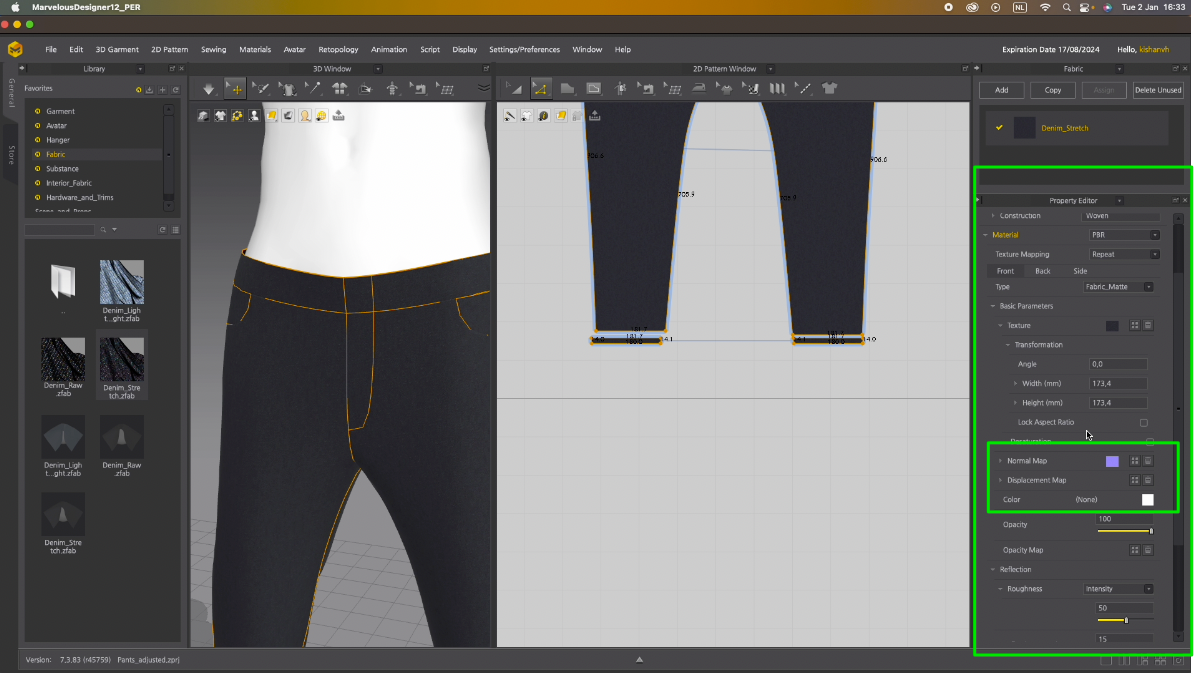
Save your project. The garment is finished. Prepare to export this.
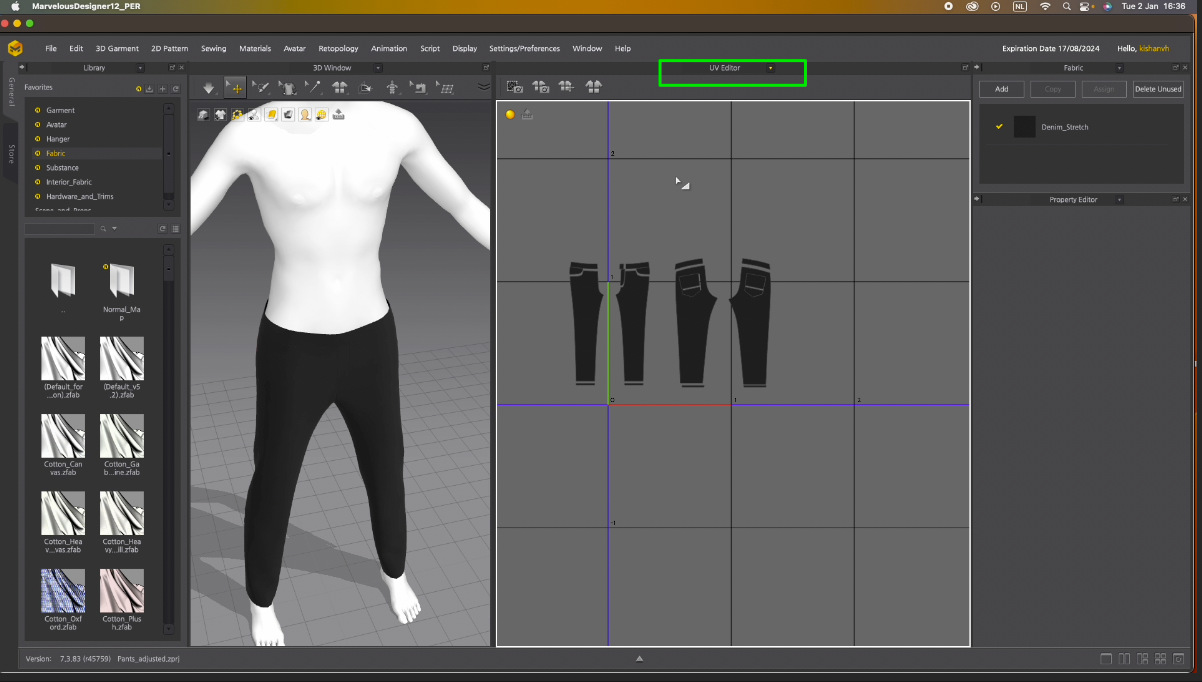
Change the 2D View Window to UV Editor.
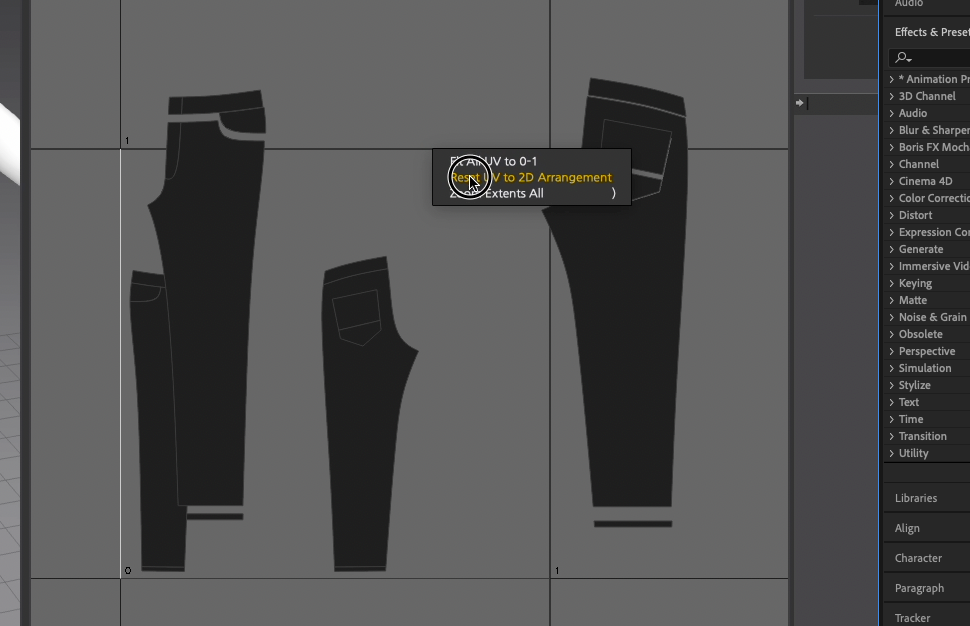
To ensure that the patterns are proportionally sized, it's correct to right-click and choose ‘Reset UV to 2D Arrangement’.
Go to the File Export, OBJ and choose the right Path. Choose a folder where you will save your export.
Name the fail. Make sure that the name contains the word “Pattern”. Press Save.
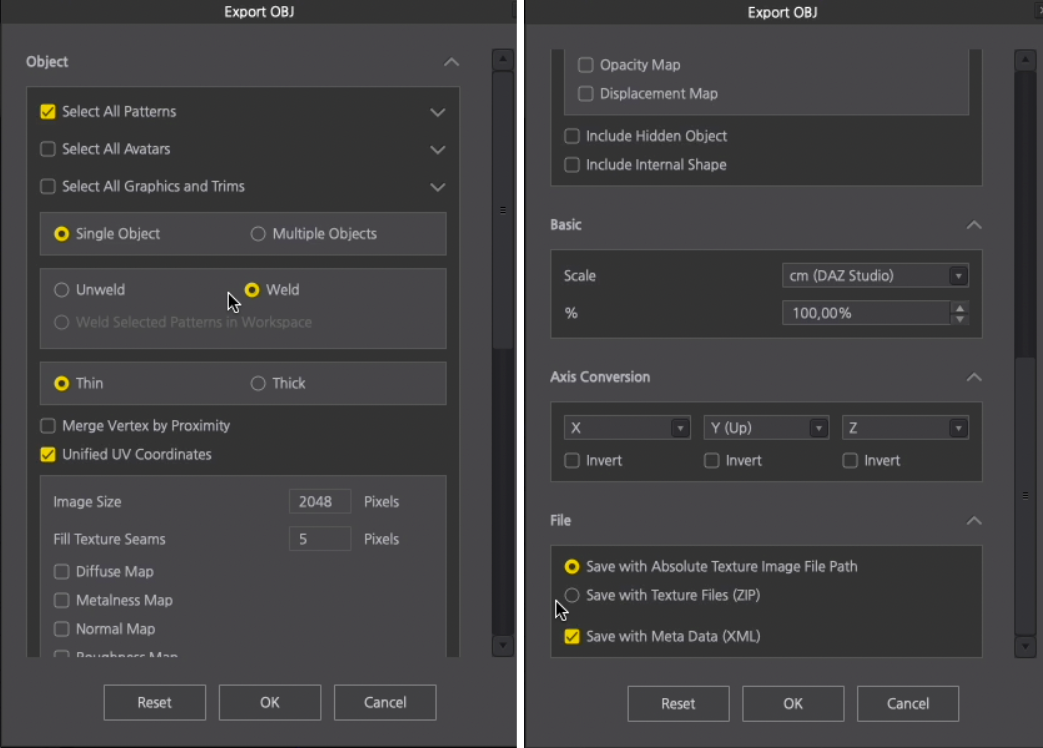
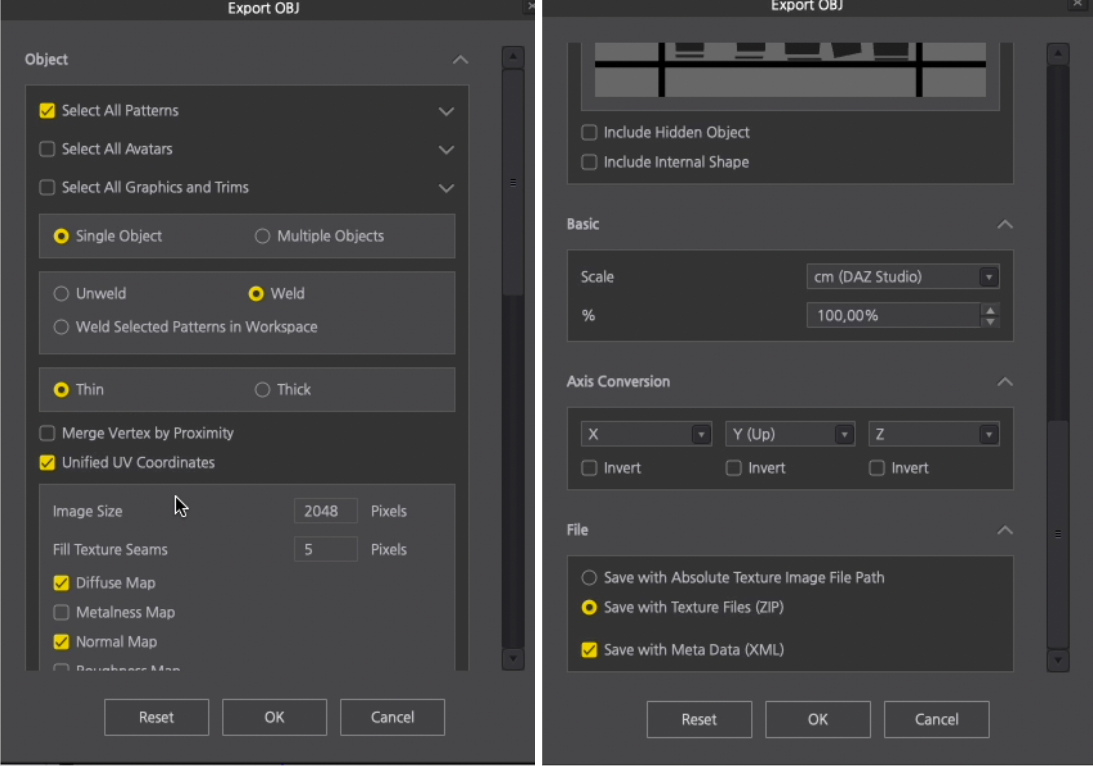
Export with the following settings and press OK.
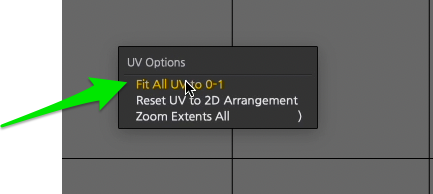
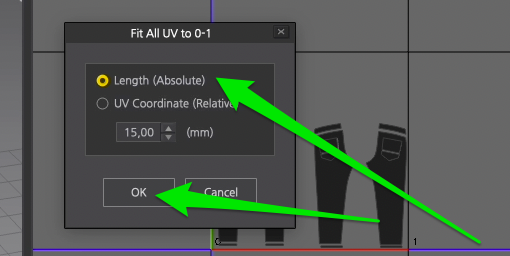
Select all patterns, right-click and choose “Fit UV to 0-1”.
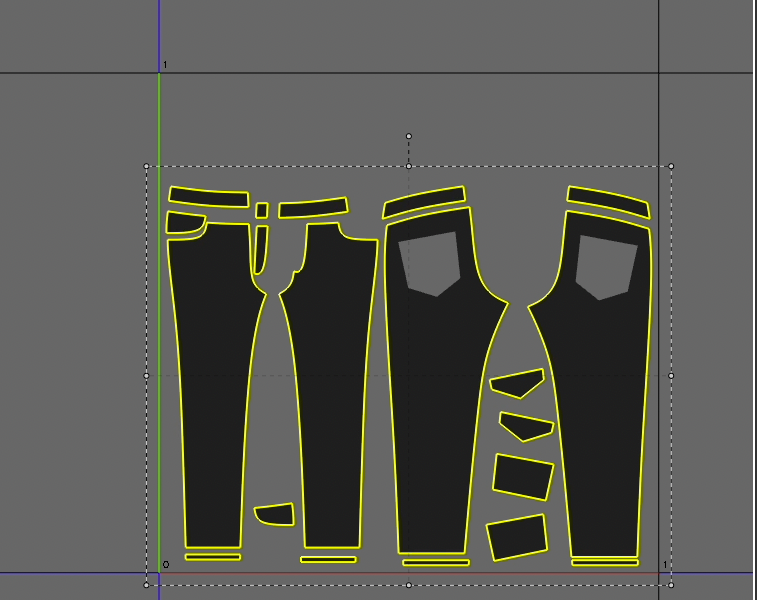
Arrange all shapes in a square layout, one next to the other. Make sure that each pattern is clearly visible and does not overlap with another pattern.
Go to the File Export, OBJ and choose the right Path. Name it. The name should contain the name of the garment, and the word “Garment”. That's really important. And click Save.
In the popup window choose the same settings. Click Ok.
Now, open File Explorer and locate the folder where you exported the files.
Unzip Tshirt_Garment folder.
Select all files andCut and place the content of this folder together with other files. Zip all files in one folder and name it.
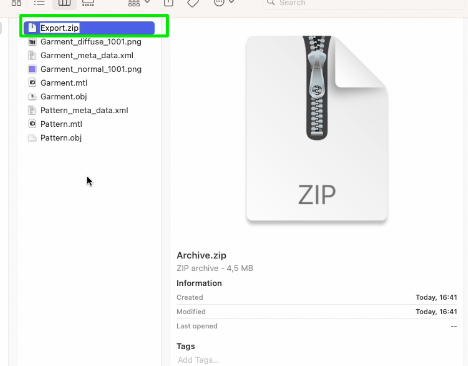
Now this folder is ready to import to outfitXR.
How to test your garment in Shopify Fitting Room
Let's set up a Fitting Room on Shopify.
Navigate to the Shopify Partners login page, and log in. Once logged in, you'll be directed to the Homepage.
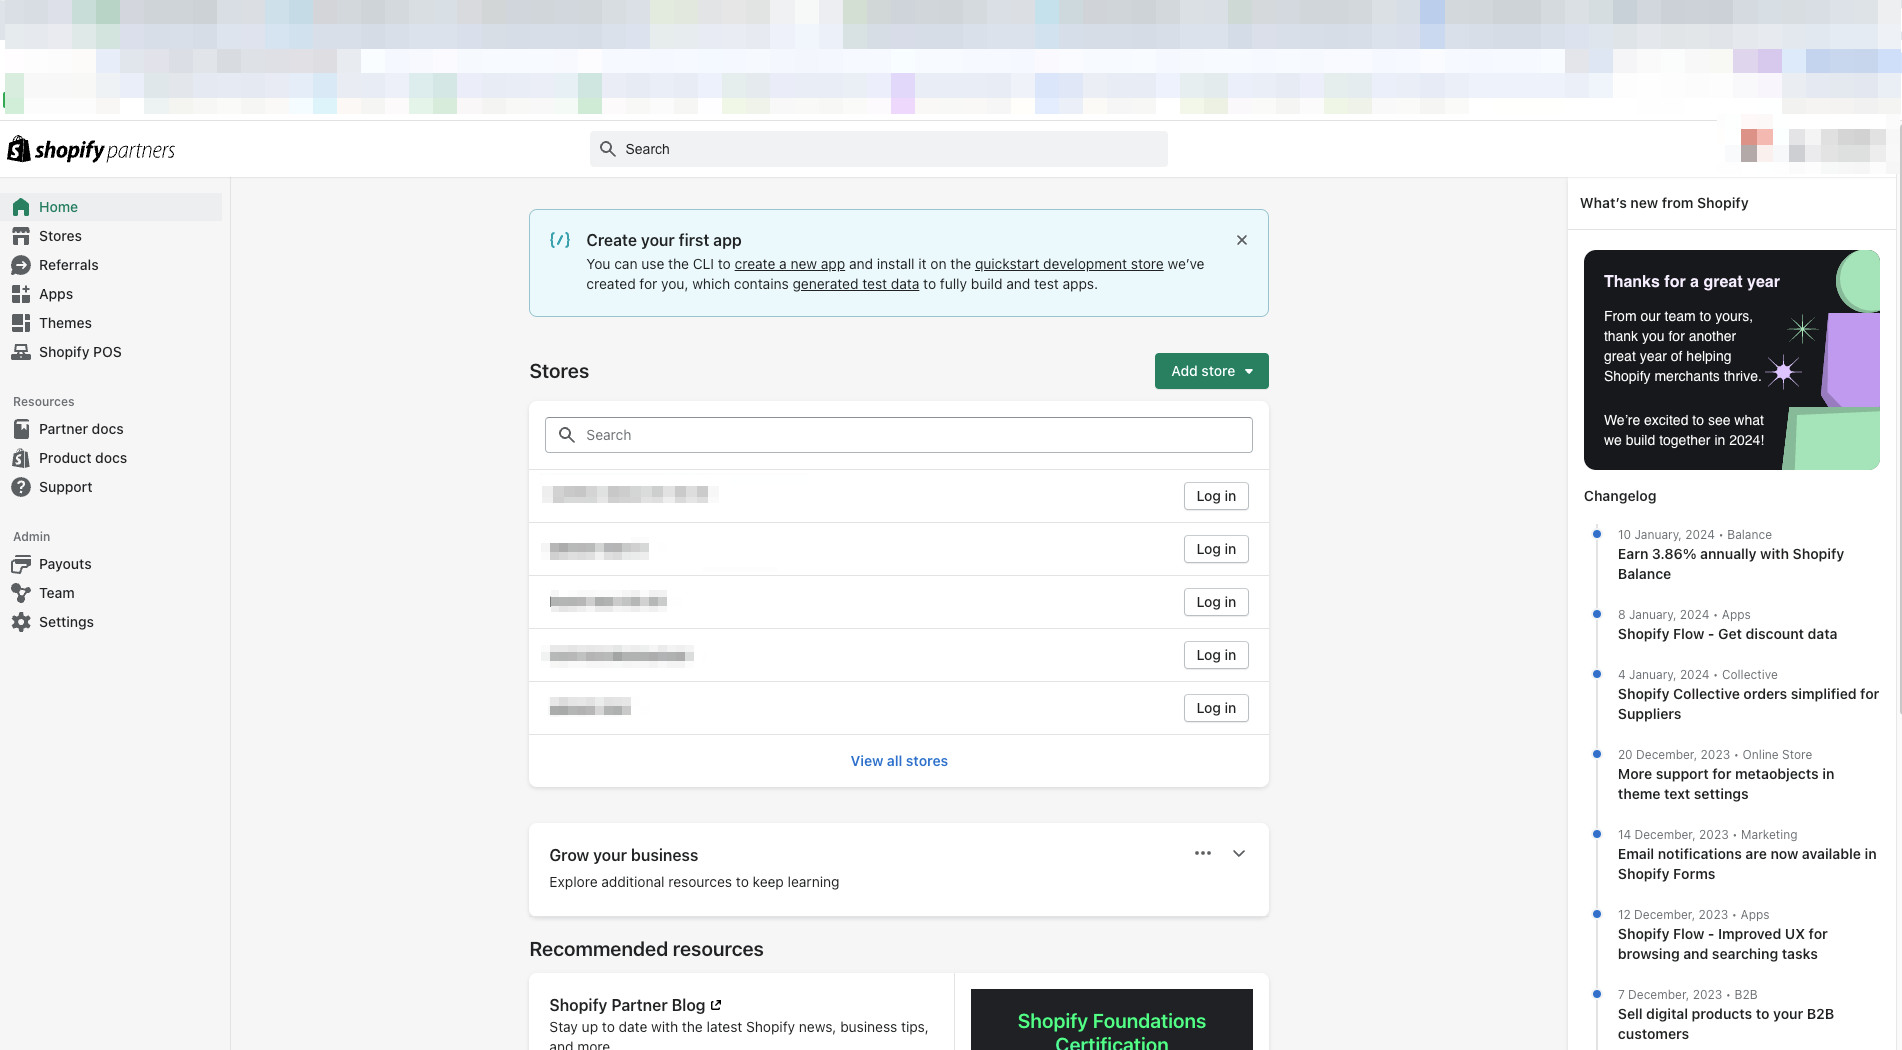
Navigate to the store section. Log in to your existing store from the list or create a new one.
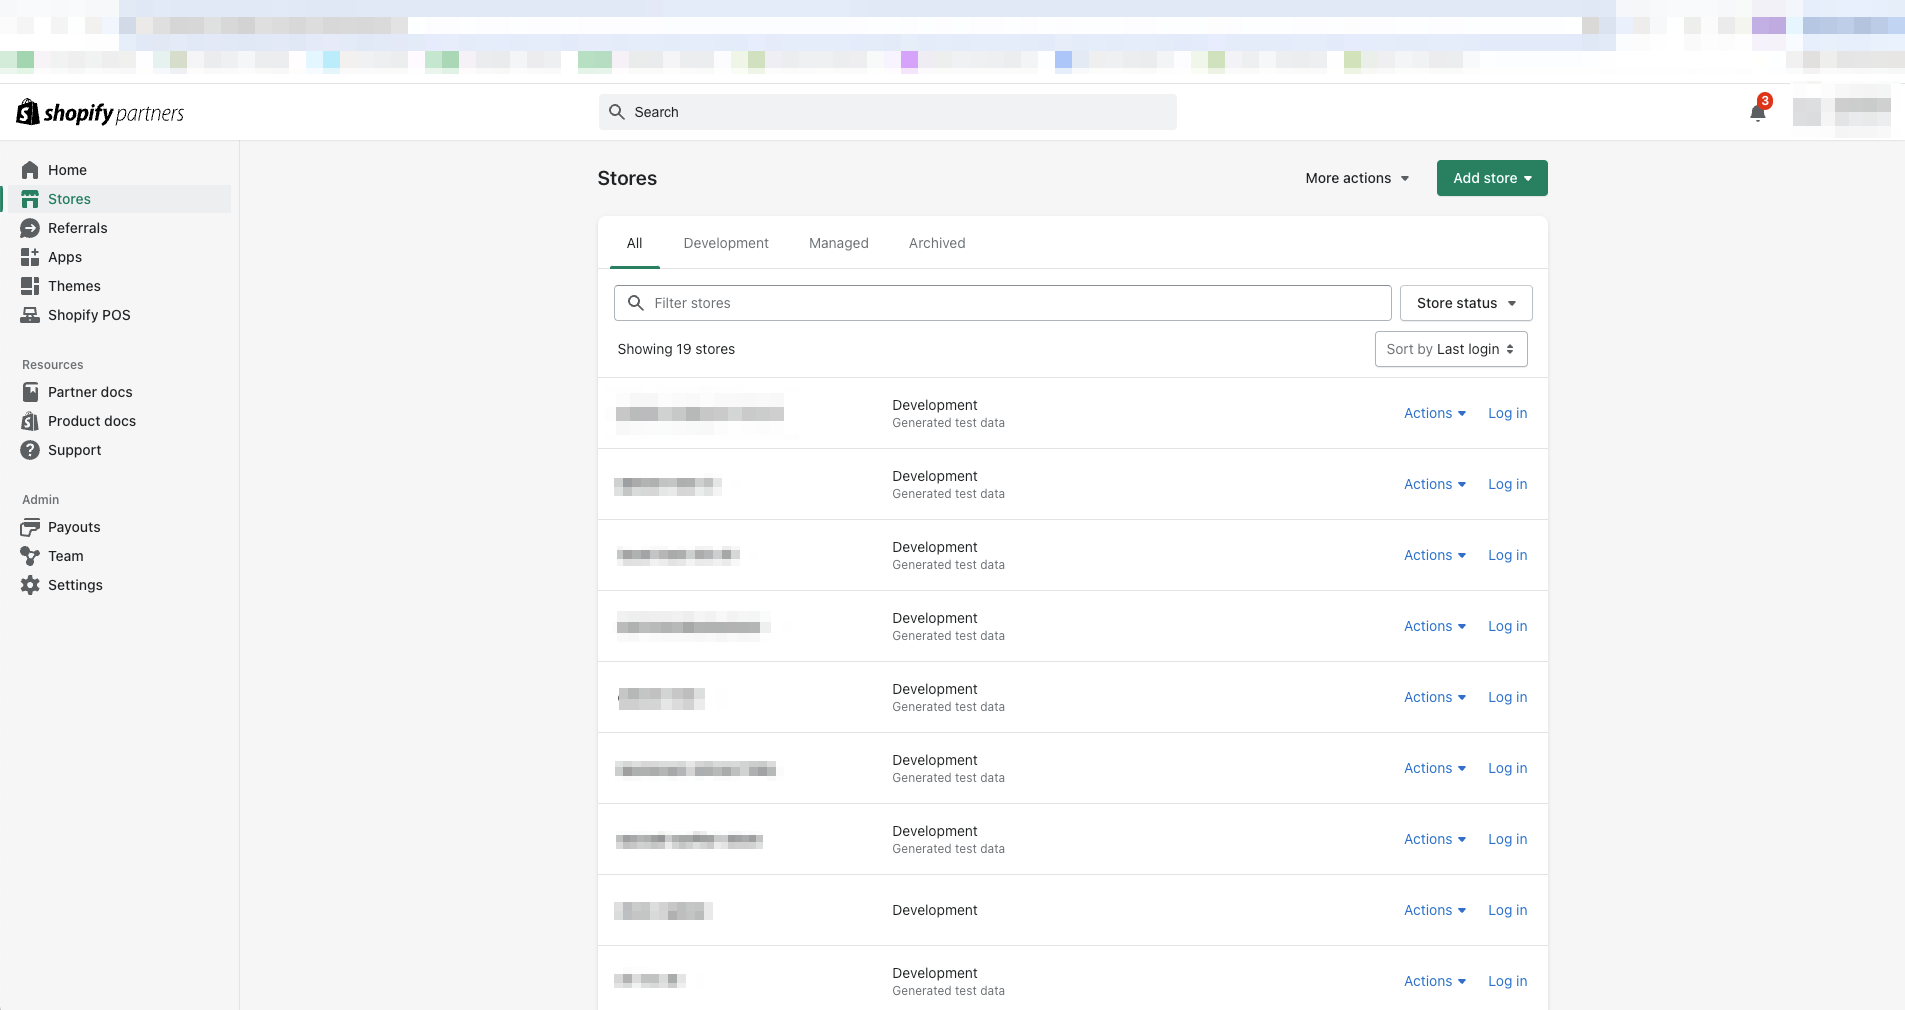
Now, you're directed to your own store.
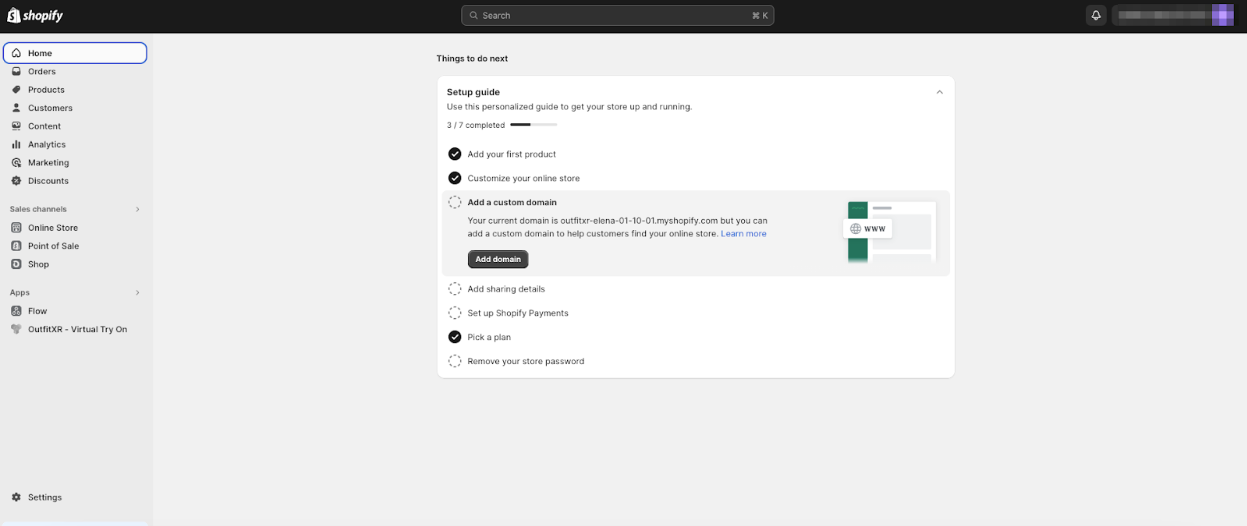
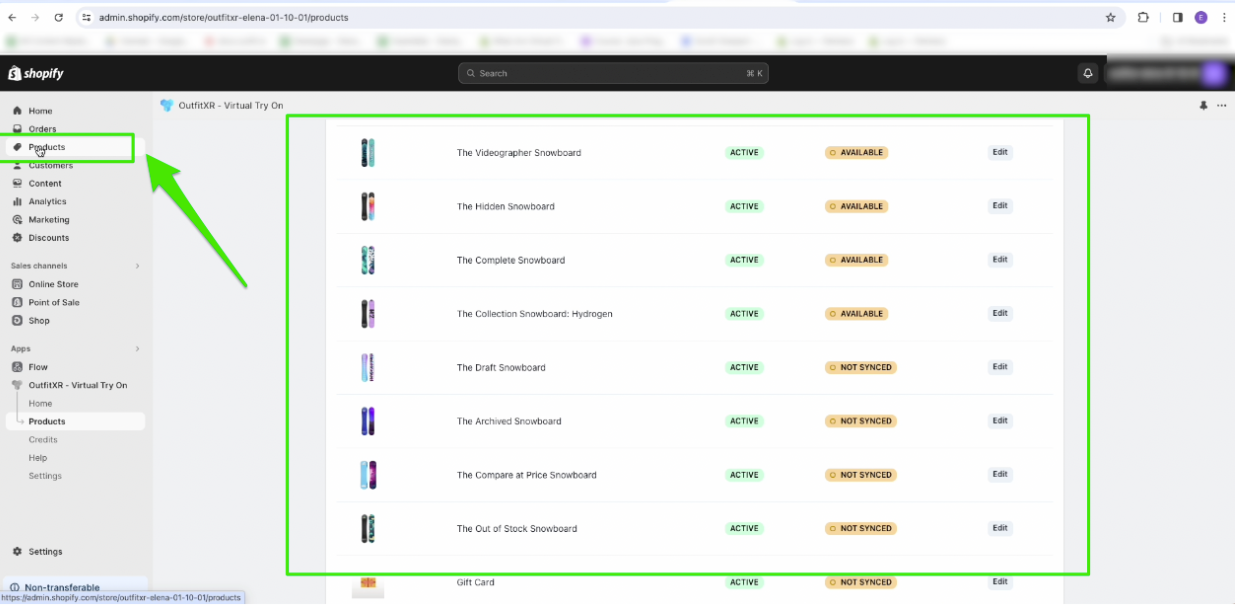
Access the Apps section and click on 'Apps' in the left-hand menu. Select 'OutfitXR - Virtual Try On' from the list of apps.
Continue by choosing 'Products' from the displayed list.
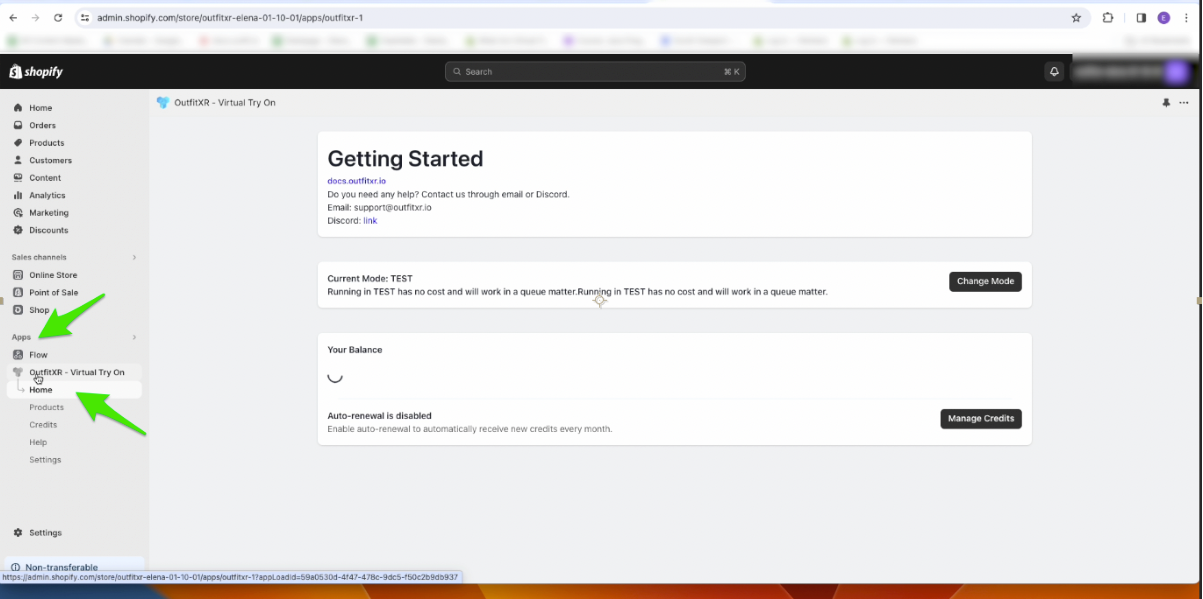
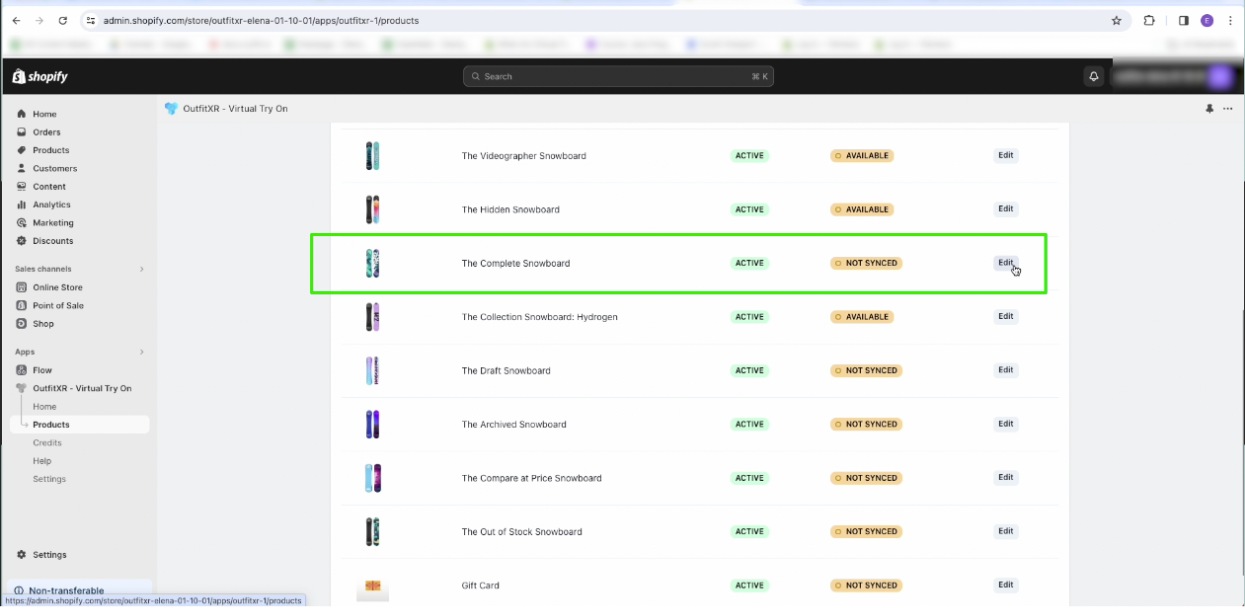
You will be directed to a page with a list of products. Select a product from the list that is not yet synced, and click on the 'Edit' button".
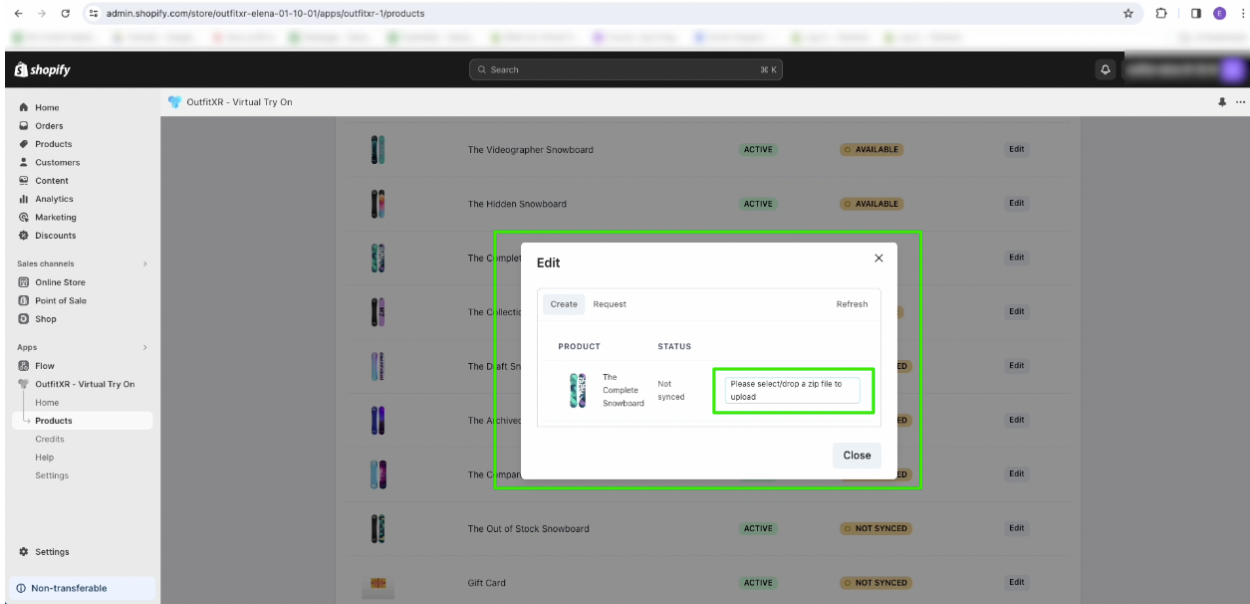
A pop-up window will appear, where you will see a field labeled ‘Please select/drop a zip file to upload'.
Locate the zip file on your computer and drag it into this field to upload it.
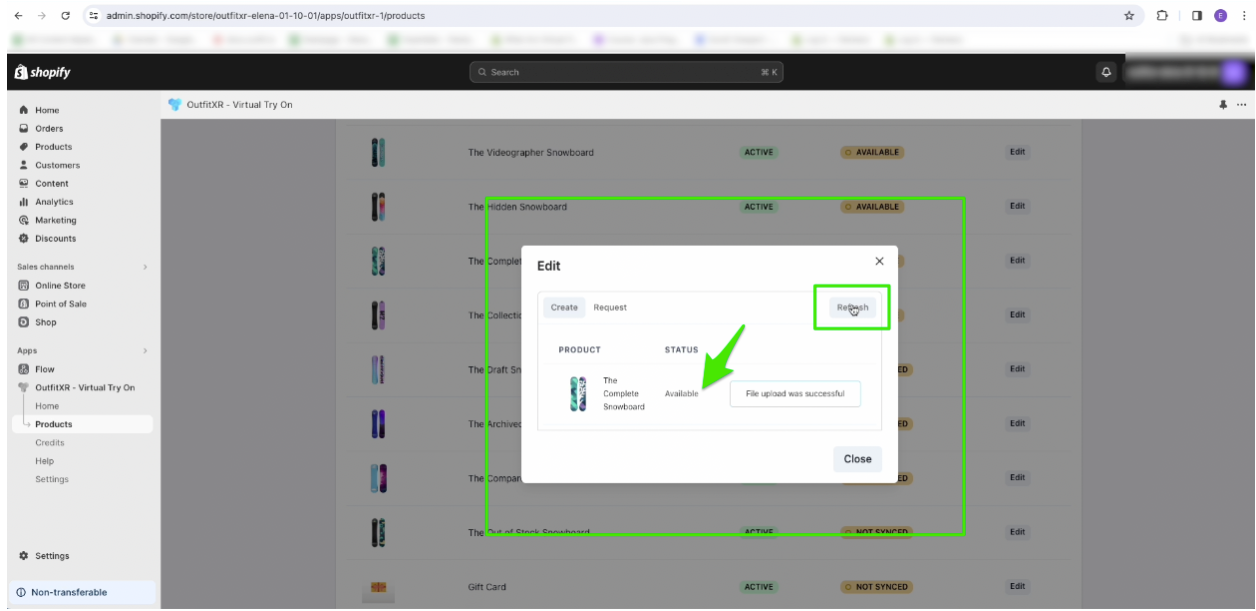
Click on 'Refresh' to check the upload status.
You can click 'Refresh' a few times; make sure the status now shows 'Available.' Once confirmed, you can close the window.
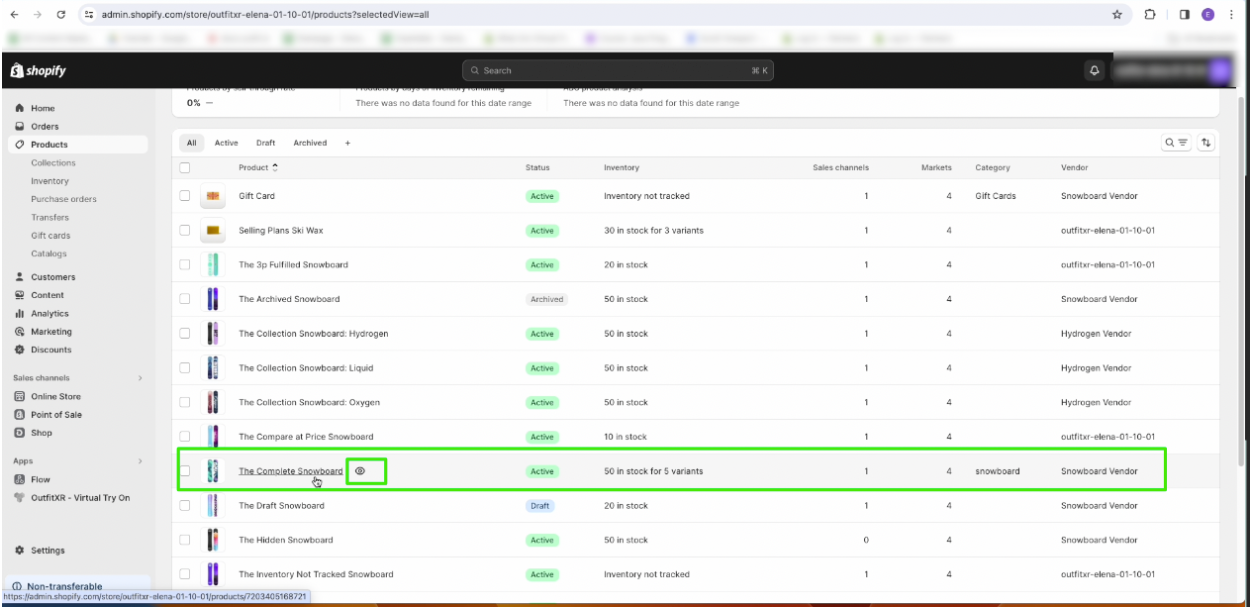
Now, to create a fitting room, access the 'Products' page from the top-left menu.
Search for the recently edited product in the displayed list and click on the eye icon to access it.
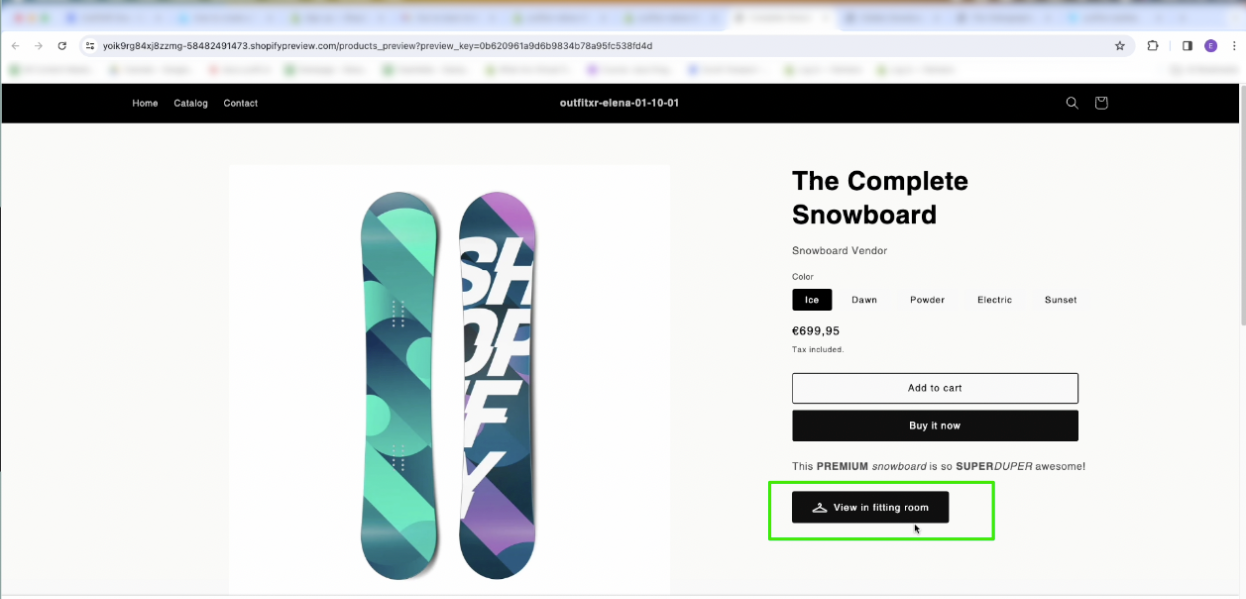
After the product has opened, you will see a ‘View in Fitting Room' button on the right side of its page. Click on it. And then Click on 'Book a new’.
Now, select an avatar and click the 'Create Fitting Room' button.
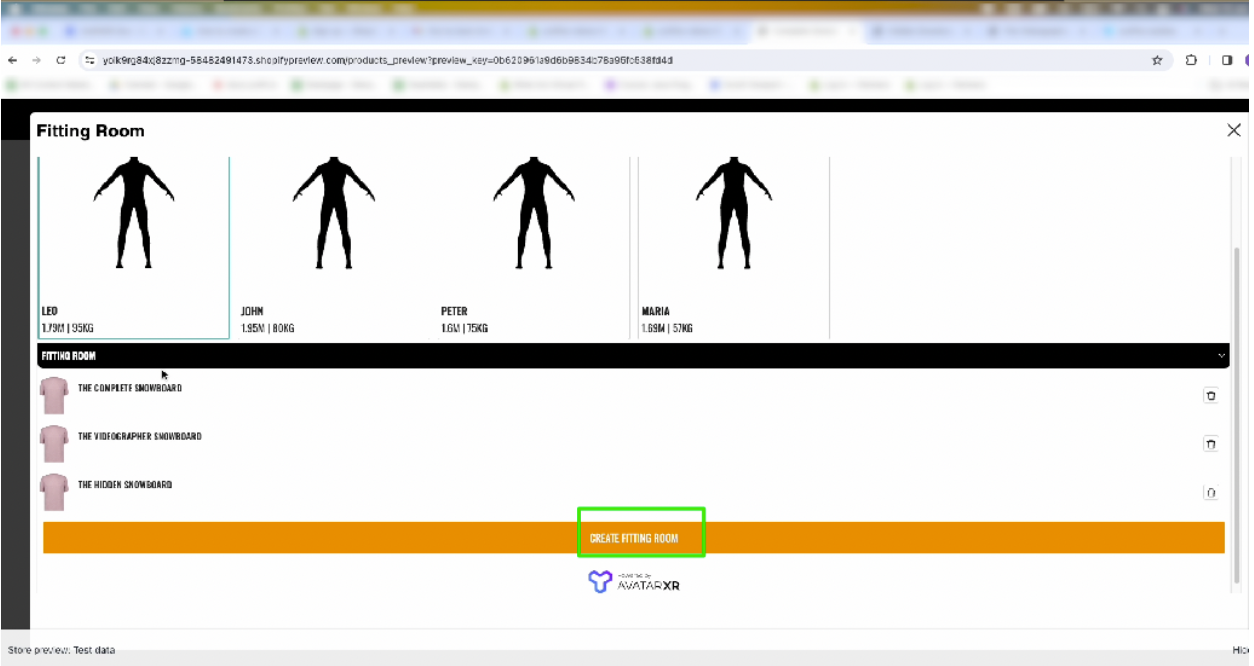
You will be automatically redirected to the Fitting Room.
Wait until your personal fitting room loads to test the garment.
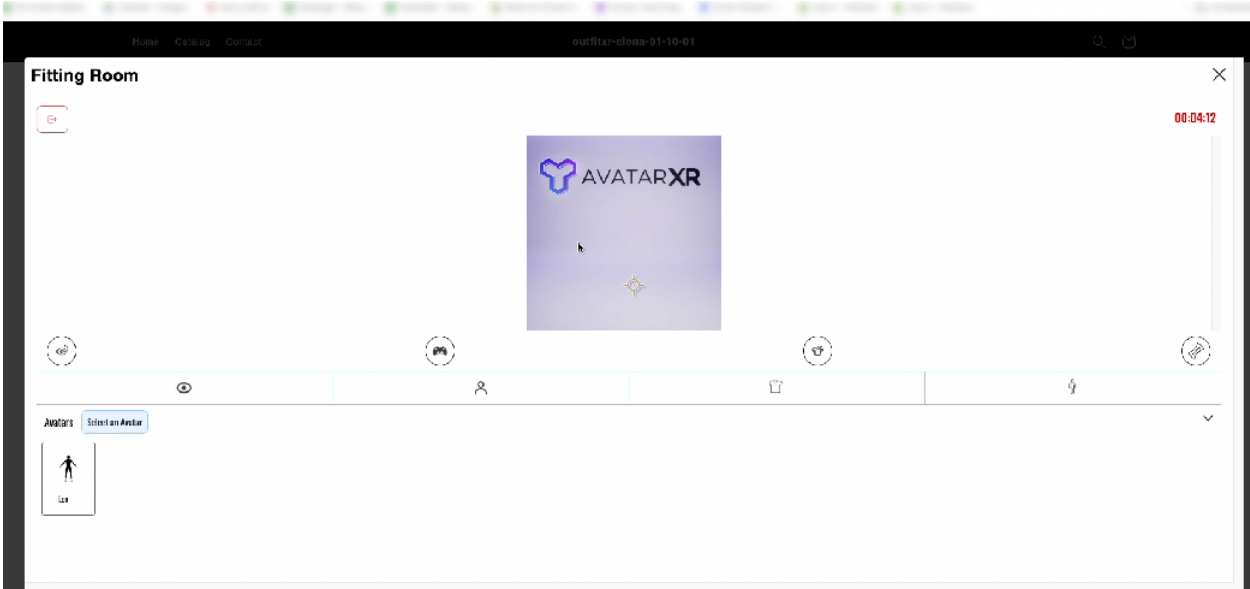
Once the fitting room is displayed, you have the option to select an avatar and then proceed to try on clothing garments on that chosen avatar.
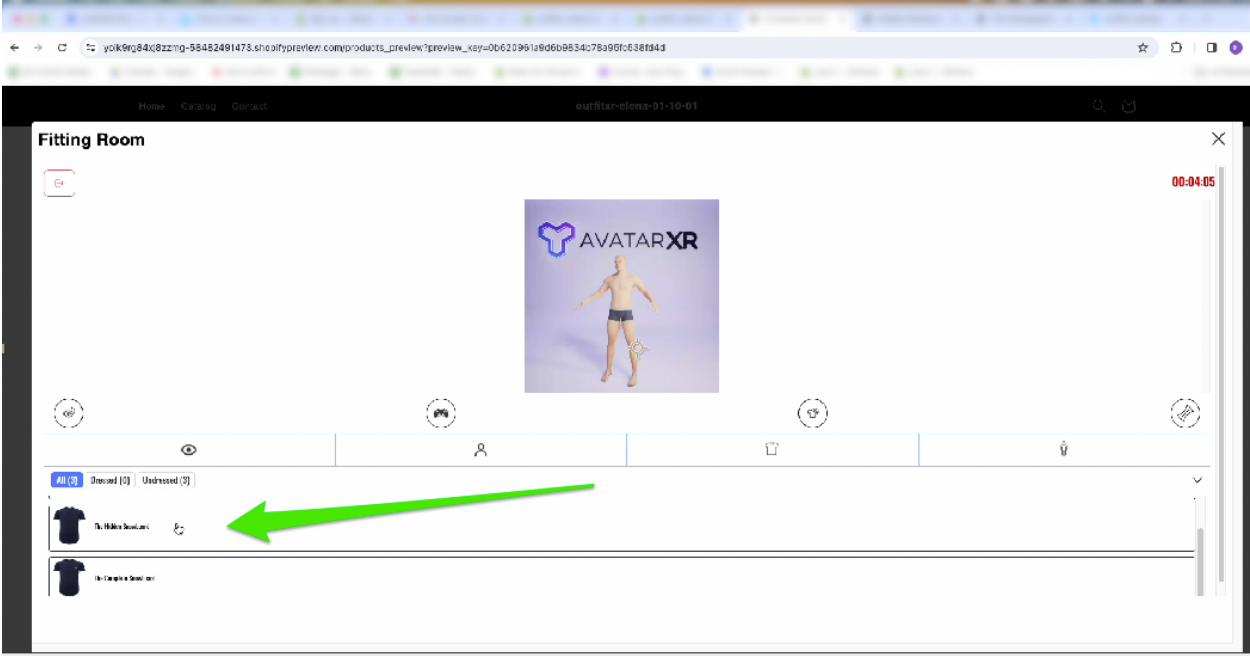
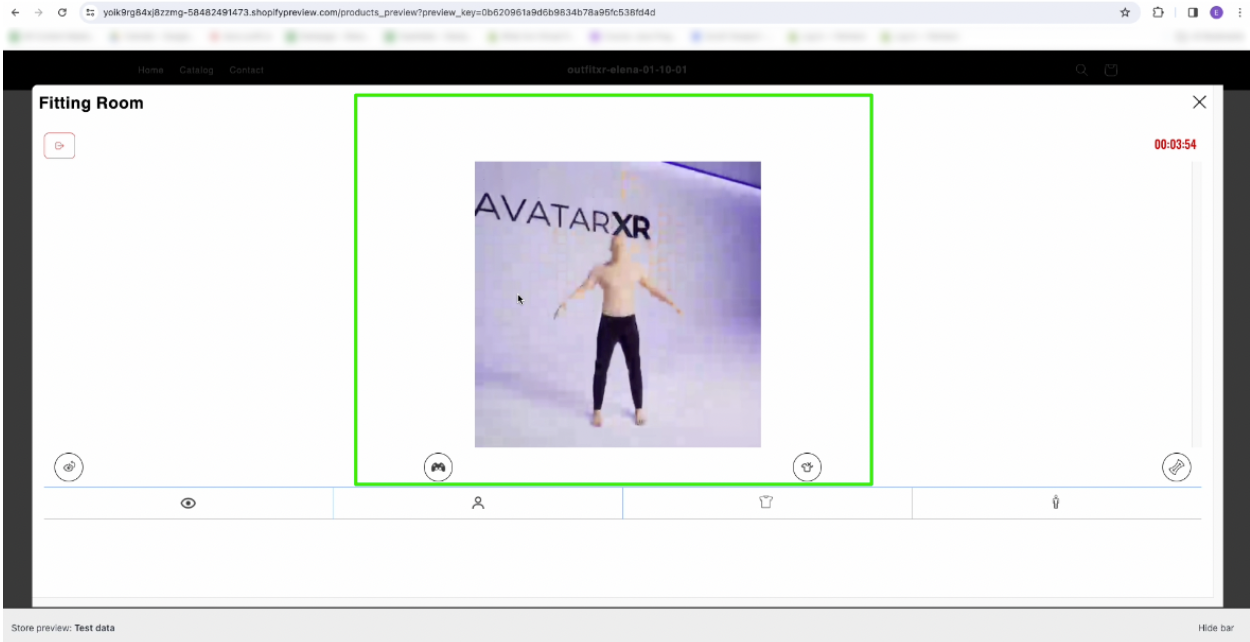
In the displayed fitting room you can see the simulation of the garment on the avatar.
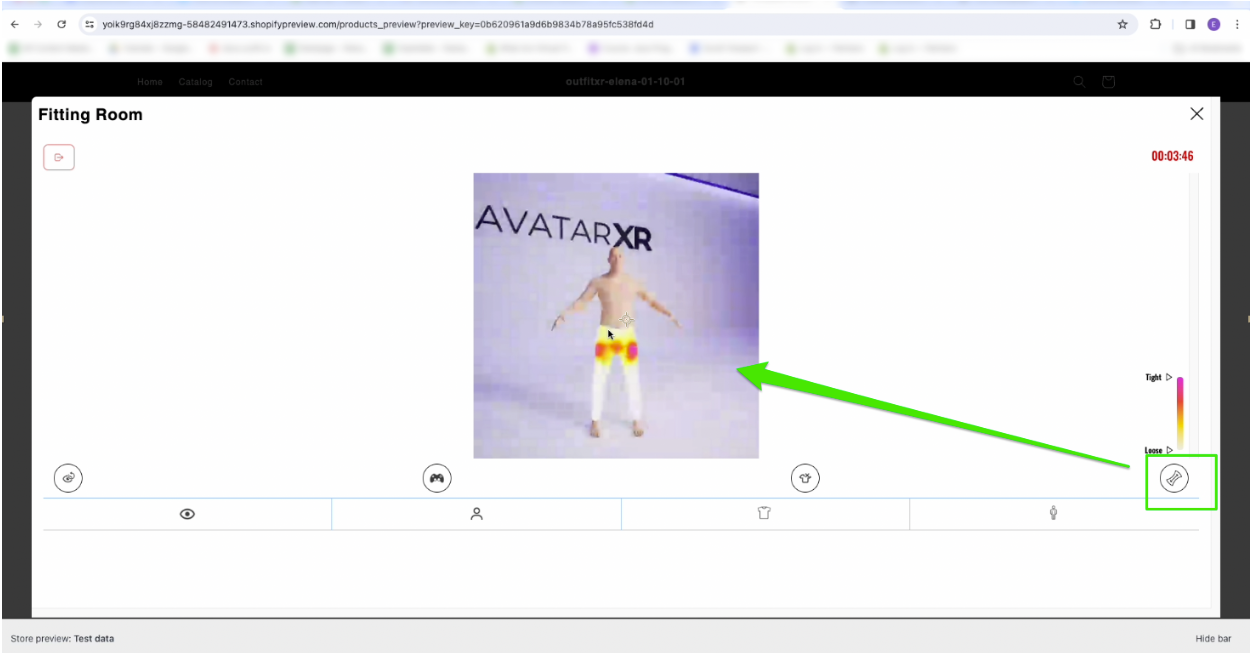
Use the 'Heat Map' option to visualize how garments of different sizes fit on the avatar. This allows you to observe whether the garments are either too loose or too tight on your selected avatar.
Utilize other properties to manipulate the fitting room and the avatar.
